B+W ND 3.0 (1000x) 10-Stop Neutral Density Filter…
by Rodney Campbell on Feb.15, 2011, under Life, Photography
I recently purchased a B+W ND 3.0 (1000x) 10-Stop Neutral Density filter in 77mm format – this thing basically looks like a piece of black glass in a filter ring :). I purchased mine online from Maxsaver.net however you should be able to find B+W filters at any good photography specialist.
The goal of an ND filter is to reduce the amount of light coming through the lens into the camera. Typically this might be for one of two main reasons: To enable the use of larger apertures (for a smaller depth of field) where a bright condition would normally not allow this (without over exposure). Alternatively to reduce/lengthen the shutter speed for creative blur effects with moving subjects or in fact masking them out entirely (e.g. moving people in a scene). Ideally it will reduce and/or modify the intensity of all wavelengths or colors of light equally, giving no changes in hue of color rendition.
The B+W ND 3.0 (1000x) reduces the light by a whopping 10 Stops – this converts say a 1/60 second exposure into a 16 second exposure!
Because this filter reduces the light intensity by about 1000 times (which basically renders the viewfinder almost completely dark) you would normally do the following when using it…
- Use a tripod and remote/cable release (or self timer) (we will end up with much longer shutter speeds)
- Compose the shot without the filter attached (because you can’t see anything with the filter on)
- Set the focus (and then set to manual focus), White Balance (manual) and check the exposure (take note of the exposure settings – Aperture & Shutter Speed) without the filter attached (because the camera may find it difficult to do any of these things automatically with the filter on)
- Attach the filter
- Adjust the exposure 10 stops from the one taken above – in Manual mode set the appropriate Aperture and Shutter Speed – either via opening the aperture or lengthening the shutter speed (or a combination of both)
It is also important to ensure the ‘effect’ (created by the bigstopper) compliments the composition rather than it being just about the effect. As with photography in general you need to be drawn to the image first by the composition then the wow factor with the bigstopper effect!
I was out doing a sunrise shoot with some friends on the weekend so at the end after the sun had risen (as it turns out we had no actual glorious sunrise – we had totally cloud filled skies so it just got gradually lighter 🙁 ) I tried the filter out and the following are my first shots using it – I didn’t actually take my own advice above (except for using the tripod) and I ended up almost guessing a suitable shutter speed and aperture combination and I let AutoWB (and adjusted the RAW in post) and auto focus do it’s thing (infinity probably).
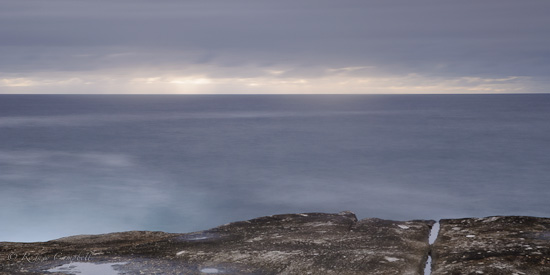
The following shot was taken essentially pointing into the sunrise and on top of the ND3.0 I also used a “hand grad” to reduce the brightness of the sky (sort of a makeshift graduated neutral density filter) – basically I put my hand in front of the lens (covering the top half of the image (the sky)) and then moved it up and down to expose the sky less during the 20 second exposure. The main effect we get here is turning the ocean into a misty blur by the use of a very long shutter speed.
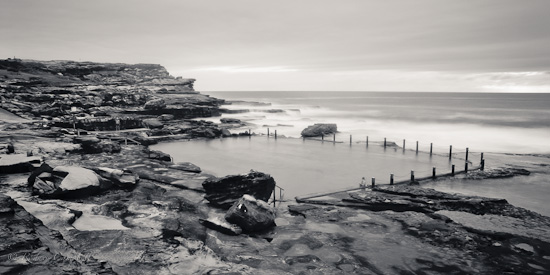
This second image also results in that milky moving water even though it is quite light after sunrise (8AM) – I’ve also converted and processed the image as monochrome.
Once I get a better chance to test out the filter I’ll post up some hopefully more interesting examples.


April 11th, 2011 on 2:55 pm
Is that the Mahon Pool I see?
Nice photos.
April 16th, 2011 on 6:45 pm
Yes indeedy 🙂 and thanks…