Archive for July, 2012
Blue Hour from the Chair…
by Rodney Campbell on Jul.17, 2012, under Life, Photography
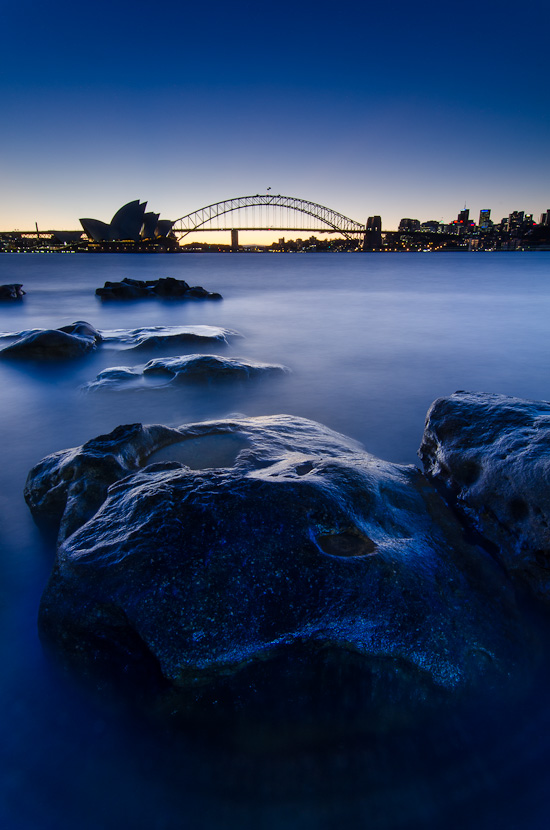
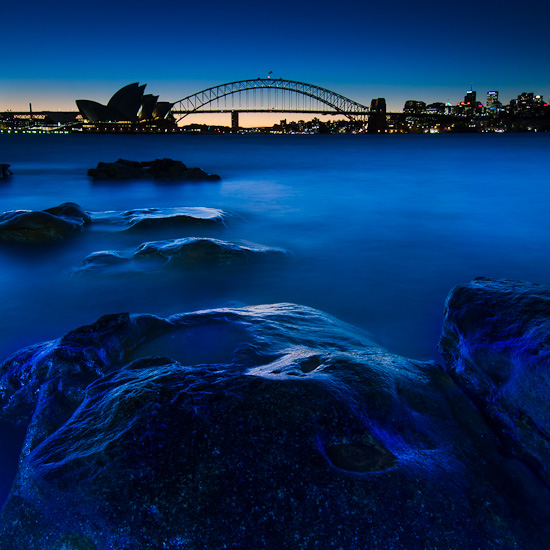
Headed down to Mrs Macquaries Chair for some sunset and twilight views over the harbour.
I found some nice rocks which when viewed from the right angle lined up nicely to allow a view towards the Opera House and Harbour Bridge and then it was just a matter of waiting for sunset and trying not to get too wet with the waves coming in from the wake of the large boats passing on the harbour (my feet/shoes and bottoms of my jeans got soaked – which was disappointing on a bitterly cold winters night in Sydney – but hey you’ve got to take some hits for your craft I guess :)).
Another cloudless event for me (at least in the direction I was pointing) which meant no real interest other than a touch of colour in the sky. This leaves all the action from the horizon down 🙂
I tried some long exposures with the ten stop neutral density filter before sunset and then just as the sun hit the horizon – nothing particularly worth showing unfortunately.
It was left to twilight to save the show – so with a circular polariser and both my 3 stop (0.9) and 2 stop (0.6) hard graduated neutral density filters stacked I waited till I could get exposures long enough and with colour I liked.
Note: These images (especially the wider shots) look much better when larger – so click any of the images below to see larger versions in an inline overlay slideshow gallery viewer.
This first is at 5:23PM (about 25 minutes after sunset) and a 170 second exposure to get a nice eerie look to the water and the rocks (I also did a little light painting of the rocks with my LED torch – with some localised white balance adjustments of the torch light in post processing)
This one is at 5:35PM and is at about the end of the colour in the sky – I’m tossing up whether I like this square crop (which makes you feel much closer to the foreground rock) or the wider vertical aspect above better… what do you think?
Blue Hour
BigmOS (Sigma 50-500) Landscapes…
by Rodney Campbell on Jul.15, 2012, under Life, Photography
On the way back from my sunrise session at Bombo Quarry I kitted up with the new Sigma 50-500 OS (BigmOS) lens and looked for places I might stop and take some detailed landscapes with the long lens – all taken handheld.
Note: These images (especially the wider shots) look much better when larger – so click any of the images below to see larger versions in an inline overlay slideshow gallery viewer.
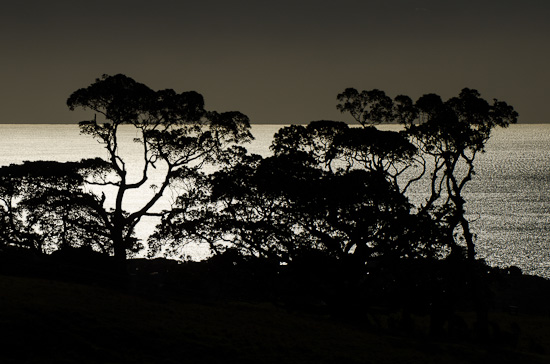
This silhouette of trees caught my eye when I’d stopped to shoot (the other way actually :)) some rolling green hills flowing into the sea near Kiama bends. Shooting it almost into the sun (with a healthy dose of negative exposure compensation (-4EV) so as to not blow out the details in the water) with the sun reflecting brightly off the ocean produced this result (pretty much straight out of camera)
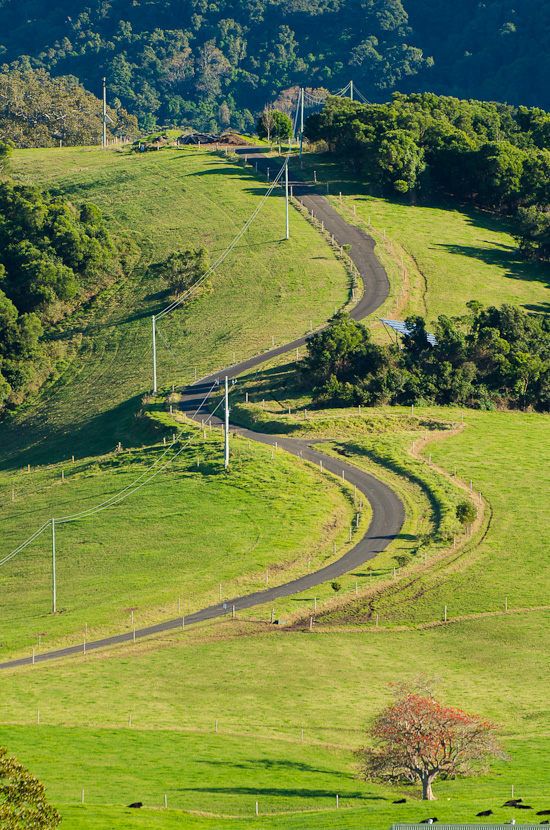
I’d driven past this winding road going up the hill on a number of occasions and thought to myself that I wanted to take the shot – today was my chance – without the family in the car 🙂 and low early morning light raking the hills
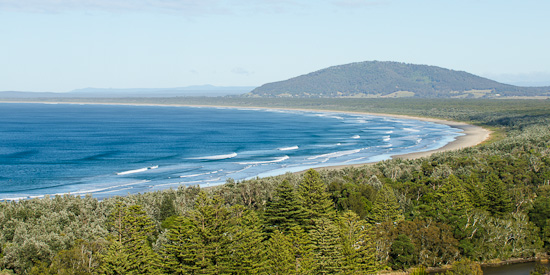
Lastly from the headland above Gerroa beach (near Gerringong) – the blue water, the repeating curved white lines of the incoming waves and the textures of the green and silvery leaves were an instant attraction as I drove over the crest
In hindsight a polariser would have been a nice addition to the last two shots however the 50-500 takes a 95mm!! thread so not particularly common and pricey :). Perhaps one day if I get the 105mm CPL for my Lee filter system I can get a 105 to 95 step down and use it on this monster (no hood though).
Triggertrap Mobile for IOS Review…
by Rodney Campbell on Jul.12, 2012, under Life, Photography
Have an iPhone and a D-SLR? Wouldn’t you love to be able to control your fancy camera in varied cool and creative programmable ways from your fancy IOS interface… well now you can…
Triggertrap Mobile is a neat combination of a relatively inexpensive ($10 for Full or Free basic version) iPhone (IOS) app and some relatively inexpensive hardware (dongle+cable $20) (ordered through Amazon) to connect your iDevice to your camera to trigger it in a variety of programmable ways.
Triggertrap Mobile currently supports 12 different trigger modes
– Timelapse
– Sound sensor
– Shock & Vibration sensor
– Metal & magnetism sensor
– Facial recognition
– Long Exposre HDR – bracketing with up to 19 exposures per set and configurable steps between each exposure
– LE HDR Timelapse mode
– Motion detection mode
– Star trail mode
– Distance-lapse mode – enables the user to set up a camera to take a photo at regular distance-intervals (e.g every 100 meters); when they are assembled into a movie, it appears as if the entire journey was conducted at exactly the same pace
– Eased timelapse – when doing a traditional time-lapse, a user would choose to take a photo, say, every 10 seconds. In Eased Timelapse, however, the Triggertrap Mobile App uses mathematical formulas to vary the interval between photographs dynamically. The result is that, in the assembled time-lapse video, it appears as if time speeds up at the beginning of the video, and slows back down at the end
– Cable Release mode – with Bulb mode (hold the button for long exposures), Timed Bulb mode (press the button to start an exposure, press it again to finish), Long Exposure mode (the user can select any exposure from one second to 60 minutes
As for camera support – more than 270 camera models from a dozen different manufacturers are supported.
There are a number of competing products available which operate in essentially the same way (e.g. ioShutter and Trigger Happy), however whilst their App store apps are about the same price the cost for their cables were much higher (in the $50-70 range). The other advantage to the Triggertrap solution is that the cable comes in two parts – the common main control dongle which connects to the iPhone ($10) and the simple adapter cable which is camera specific (also $10), so if you want to support multiple camera types or change cameras you only need to purchase a new version of the later cable and not replace the whole lot.
Triggertrap seemed to have all the features at the best price so I thought for the minimal outlay I’d give it a shot.
The following video probably shows the functionality of the product best:
So sounds too good to be true – it appears to have many similar features to the very expensive ($300+) Promote Control – what’s the catch?
Firstly – the way it triggers the camera is using sound waves out the headphone socket of the IOS device and put simply when shooting bulb mode exposures timing variances like the shutter lag of the camera itself can affect the accuracy of your exposures.
If your camera doesn’t have a Bulb mode, you’re out of luck, because the Triggertrap needs to be able to control your SLR camera’s shutter speed. Also some SLR cameras have a minimum exposure in bulb mode (e.g. 1 second). That means that if you send a 2-second exposure, it’s correct. However, if you send a 0.5-second exposure, you’re out of luck; the camera will still take a 1-second exposure.
You don’t really have a maximum exposure length, but you do have a minimum exposure length:
The minimum exposure length Triggertrap can support depends on the shutter lag of your camera, and the fact that shutter lag is often variable. You can minimise the problem by specifying the average shutter lag by using the Lag-O-Meter (a built in test you can perform), but that doesn’t completely cover the problem.
For example the measured shutter lag on my D7000 varied around 120 to 160 milliseconds. Obviously, that doesn’t matter if you’re working with 1-second exposures (the difference between 1120 and 1160 millisecond exposures is 3.4%, which in photography terms doesn’t really make that much of a difference). When you are trying to do a 1/8th of a second exposure, however, things are different. A 1/8th of a second is a 125ms exposure, so a difference of 40ms is huge: The difference between 125 and 165 is nearly 25%, which is significant.
So Long story short: anything shorter (faster) than about 1/2 a second is unacceptably unreliable in bulb mode – in practical terms this will probably only come into play when using the HDR bracketing functions – whilst you can program up to 19 brackets with Triggertrap the fastest shutter speed you’ll want to be using at one end of the brackets is around half a second (and even at 1EV increments it means the exposure at the other end will be over 68 hours long) – which is why Triggertrap calls these functions Long Exposure HDR and LE HDR Timelapse 🙂
Any other gotcha’s so far…
To begin with nothing works until you go in and actually turn on the output Channels for Shutter and Focus (they are off by default – which seems like a poor default choice to me). Until then you’re pressing buttons and so forth wondering why it’s not working (because who reads the manual or useful help screens which pop up trying to assist you :))
With Nikon camera’s (and possibly others) you cannot just select the Shutter channel and use it to trigger a camera set to Manual focus (and Triggertrap suggests you use Manual focus to get more reliable triggering (and accurate shutter timings – since focus delay is an additional variable)). Nikon D-SLR’s won’t trigger unless they receive both a focus and a trigger signal so you have to enable both the Shutter and Focus output Channels (even with the camera set to manual focus).
There was a bad bug in the 1.0.2 version of the software (which basically made it not work on Nikon cameras) – this has been fixed in version 1.0.3 of the software.
Sunrise @ Bombo Quarry…
by Rodney Campbell on Jul.08, 2012, under Life, Photography
Having seen some photos from others around this location I’d long wanted to try the spot myself – it is however a two hour drive south of Sydney :(. I was staying the night at my parents house in the Shoalhaven over the weekend so decided to get up early on Sunday morning and make the 30 minute trip to Bombo Quarry (near Kiama) on the south coast.
I arrived about an hour before sunrise and parked in the parking area overlooking Bombo beach on Panama street – a couple of rock fisherman were also arriving at around the same time and one of them gave me some directions to where I wanted to go.
As luck would have it I ended up with a nearly cloudless morning again with just some heavy cloud on the horizon which just delayed the appearance of the sun so no brilliant coloured clouds and skies for me again 🙂
Still this location is a treasure trove of interesting rocks, pools, formations, colours, textures and lines and you could literally spend days exploring and photographing this small area. I think summer would probably be a better time to photograph the main wall of extruded rock since the rising sun might hit the face of the rock from a more southern angle rather than rising behind as it does in winter. A sewerage treatment plant is also on the headland with the outflows into the water which might explain the abundance of crazy vibrant things growing in the pools of water.
Note: These images (especially the wider shots) look much better when larger – so click any of the images below to see larger versions in an inline overlay slideshow gallery viewer.
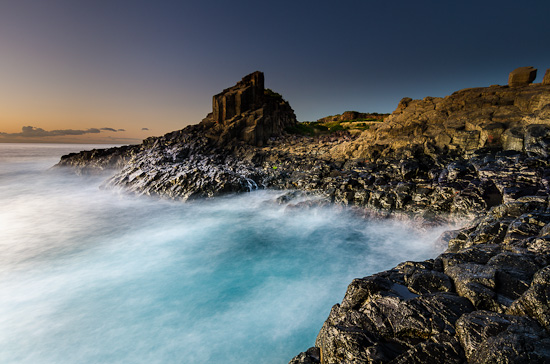
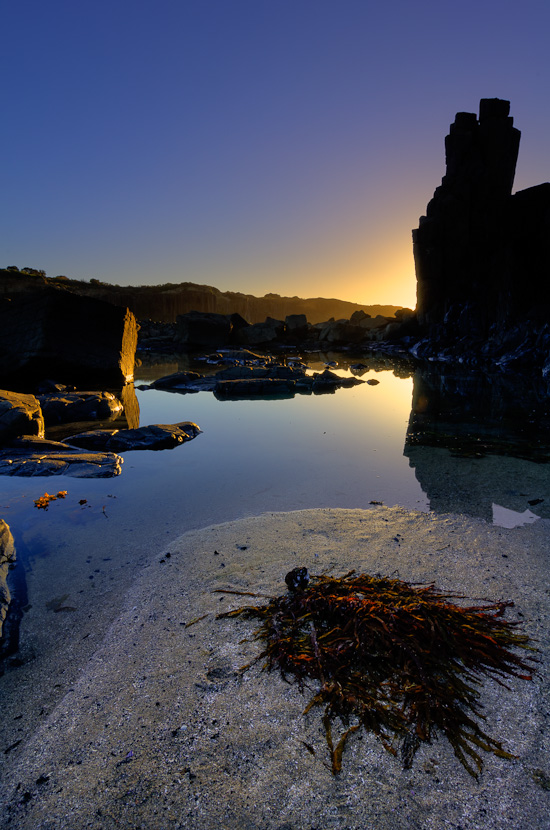
The following shot was actually looking south down the coast to catch some morning light hitting the rocks
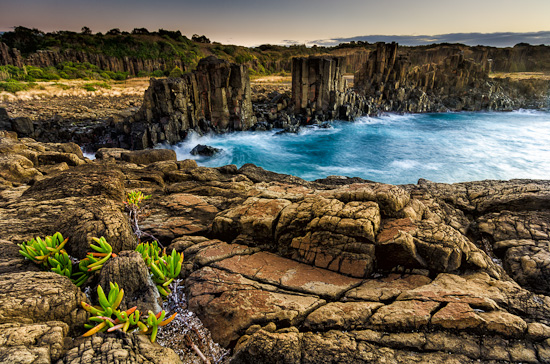
This was taken (looking north over the main rock wall) right up on top of one of the rock formations where I found this interesting lone plant gripping on for dear life in this harsh environment amongst these great textured rocks
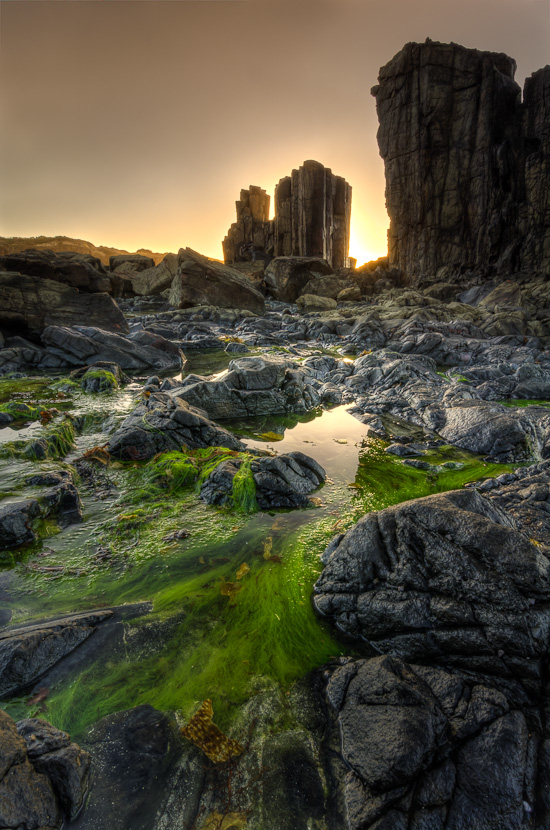
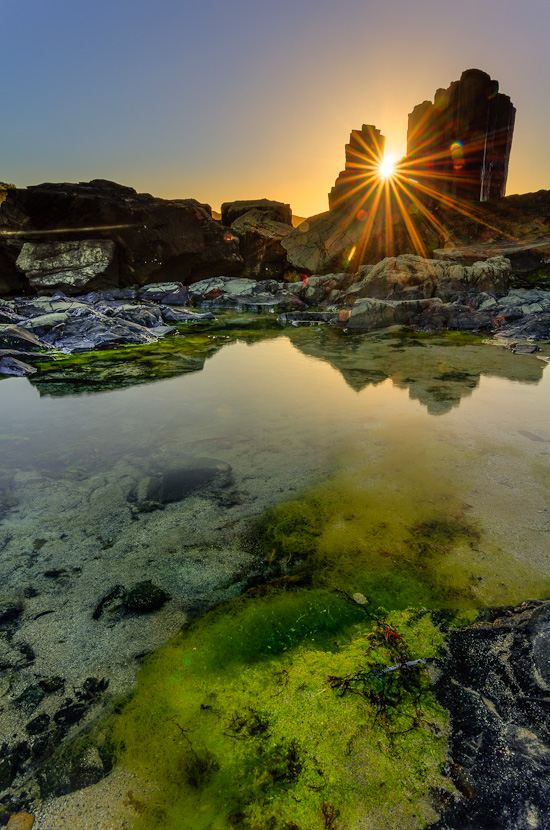
After sunrise I spent some time behind the rock wall photographing some interesting rock pools with the rocks silhouetting the rising sun
.
.
Aputure Amaran Halo LED Ring Flash – Real World Test…
by Rodney Campbell on Jul.05, 2012, under Life, Photography
This post is a follow up to previous posts – Aputure Amaran Halo LED Ring Flash and Aputure Amaran Halo LED Ring Flash – First Test and is my first real world test of the unit.
After having been disappointed when I didn’t have this unit with me when I took a few macro shots on my sunrise visit to North Head I decided to take a stroll in the streets around where I live and see if I could find something to capture.
Unlike the shots at North Head these are all handheld with just the camera with my Tamron 90mm macro with the LED ring light attached to provide a constant addition of light. With all shots I pretty much have the lens in manual focus at or near the minimum focus distance and move the camera/lens into position till I see the image I want in focus in the viewfinder and then take the shot (or a couple).
Note: These images (especially the wider shots) look much better when larger – so click any of the images below to see larger versions in an inline overlay slideshow gallery viewer.
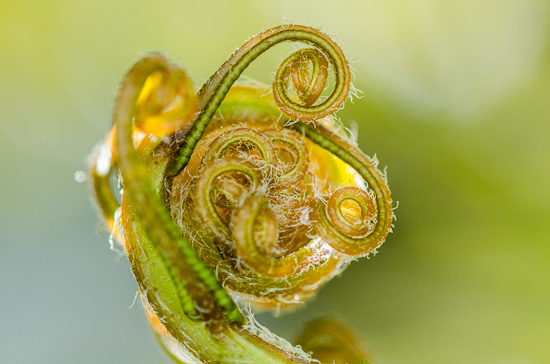
First up a close up view of some baby fern fronds unfurling – I’m probably close to minimum focus distance here and the frond is actually being backlit by the sun behind it with the LED ring light providing the front illumination. Here it has actually provided quite good illumination allowing me to use a decent handhold shutter speed of 1/160th at f/16 and ISO 1000.
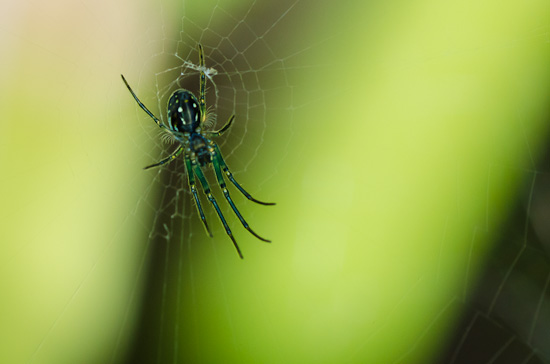
My youngest daughter found this very tiny (and it really was very tiny – perhaps only 5mm from the tip of one leg to the tip of the opposite) spider which I shot at MFD. The spider was completely shaded (although some of the background was in direct sun as you can see) so it was a matter of lining up the background elements and again the illumination on the spider is being provided by the ring light which allowed 1/160th at f/22 and ISO 1600.
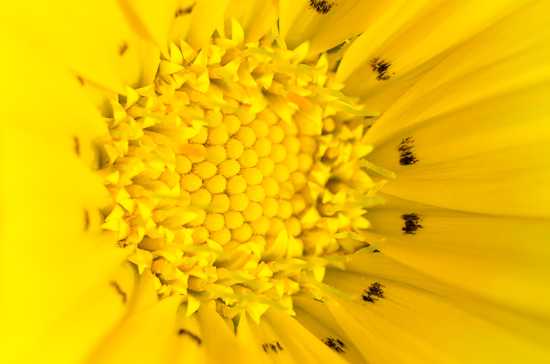
The heart of a flower (a small Gazenia I believe) shot again near MFD. In this case much of the light is being provided by the sun with the ring light just adding a little fill. 1/125th at f/16 and ISO 110.
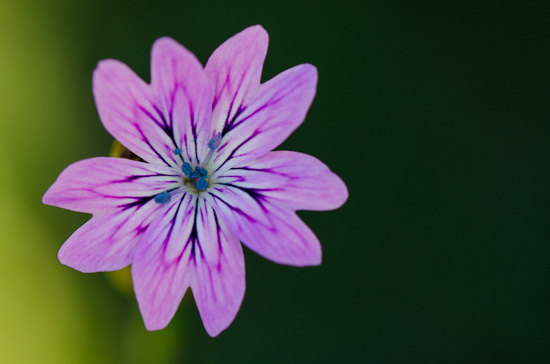
Lastly a very pretty tiny flower my daughter found. Unfortunately this flower had a very very long stem with this single tiny (perhaps 3/4 of a cm across) bloom at the top. This meant it was swaying around in the breeze which made getting a half sharp shot very difficult and I was loathe to just cut it off and take it home and shoot in controlled conditions so we made do with what we had. I shaded the flower with my body, arms and camera to try and block some of the wind which put the flower itself (and much of the grass below which you can see) into shade so the flower illumination is pretty much just ring light.
This was the best of the bunch at 1/125th at f/16 and ISO 320 – in hindsight I should have bumped the ISO to get a faster shutter and more depth of field would have been nice (perhaps a suitable candidate for some focus stacking?)
