Archive for October, 2012
Nikon (D600 and D7000) D-SLR AutoFocus System Tips…
by Rodney Campbell on Oct.31, 2012, under Life, Photography
Whilst the following was written with Nikon D-SLR’s (and D600 & D7000 specifically) in mind, most of the features and concepts described below apply across all the major manufacturers of modern cameras under perhaps slightly different names.
The Nikon D600 (FX) and D7000 (DX) share a similar auto focus system (which is also very similar to many other modern Nikon AF systems).
Specifically the D7000 uses the Nikon Multi-CAM 4800DX autofocus module with TTL phase detection, fine-tuning, 39 focus points (including 9 cross-type sensors) whilst the D600 uses the Nikon Multi-CAM 4800 autofocus sensor module with TTL phase detection, fine-tuning, 39 focus points (including 9 cross-type sensors; the center 33 points are available at apertures faster than or including f/5.6, while the center 7 focus points are available at f/8).
Most (Nikon) D-SLR’s (including the D600 and D7000) have three different Autofocus Modes to choose from, typically depending if your subject is still or moving. In addition they typically have multiple Autofocus Area Modes to choose how many of the AF points are active and how they track a moving object. You generally choose a particular combination of these two AF functions (Focus Modes and AF-Area Modes) to suit a particular shooting situation.
The following shows some specifics for the D600 and D7000 AF systems but the majority of the detail applies to all modern (Nikon) D-SLR’s.
Autofocus Modes
Single-Servo AF (AF-S)
For stationary subjects or if the distance between you and the subject is not going to change between the time you lock focus (recompose) and take the shot. When using AF-S, you can select from two Autofocus Area Modes, either Single-Point AF where you select the AF point (recommended), or Auto-Area AF, where the camera selects the AF point(s) for you. By default the shutter can only be released when the in-focus indicator is active (focus priority for Custom Setting a2: AF-S priority selection).
Continuous-Servo AF (AF-C)
For moving subjects. If the subject is moving towards you or away from you, the camera will keep evaluating the focus distance, as long as the Shutter is half-pressed. You will need to use this in conjunction with the Autofocus Area Modes to determine if and how the camera tracks the subject laterally to the surrounding AF points, or if it will only track the subject if it remains at the initially selected AF point. If the subject is going to be difficult to follow or is moving across your field of view, set the AF-Area Mode to one of the Dynamic-Area AF modes or to the 3D-Tracking mode. Focus on the moving subject with the selected point if using Single-Point, one of the Dynamic Area Modes, or 3D-Tracking, or let the camera select the AF point in Auto-Area AF, and then as long as the shutter button remains half-pressed the camera will track the subject as it moves closer or farther in distance. Depending which AF Area Mode you are using, the camera may also maintain focus or track the subject to some or all of the surrounding focus points if it moves away from the initially selected point. By default the shutter can be released whether the subject is in focus or not (release priority for Custom Setting a1: AF-C priority selection).
Auto-Servo AF (AF-A)
A hybrid of the two other focus modes. The camera automatically selects Single-Servo AF (AF-S) mode if the subject is stationary, changes to Continuous-Servo AF (AF-C) mode if the subject is moving. Why wouldn’t you use this all the time? If you are focusing and then recomposing, your movement of the camera may fool it into thinking that the subject is moving and move your focus point.
Autofocus Area Modes
The Autofocus Area Modes are used to set if just a single AF point is active or else how many AF points surrounding your selected AF point will be used to maintain focus or to track a moving subject if you are using AF-C or AF-A Autofocus Modes.
Auto-Area AF
The camera uses all 39 AF points to detect what it thinks is the subject and automatically choose the appropriate AF point(s). Generally the camera selects the nearest subject or a human in the frame, so it may not focus on what you actually want to focus on.
Single-Point AF
Only one AF point will be active, and surrounding AF points will not become active. Typically used with Single-Servo AF (AF-S) to focus on a stationary or still subject, or in a situation where you focus and recompose. It can also be used with accuracy with AF-S mode for moving subjects if the camera-to-subject distance does not change at all or very much in that period between locking focus and taking the photo. Use the Multi Selector to choose your active AF point, you can also hit the OK button to quickly select the center AF point. There is also a Custom Setting (a6 Number of focus points) which lets you choose whether all 39 AF points are available or a reduced number (11 points).
Dynamic-Area AF
In the Dynamic-Area AF Modes you select an AF point to tell the camera where to start autofocus, if your subject briefly moves from that point to a neighboring point either by them or you moving (e.g. panning), the camera will use the surrounding AF points to help maintain focus on it. Select one of the Dynamic-Area AF options (below) when you are photographing moving or potentially moving subjects using Continuous-Servo AF (AF-C) or Auto-Servo AF (AF-A). These modes are ideal for a subject moving closer or further from the camera but which may also move laterally away from the selected AF point faster than you can react in order to keep it located at that point, or for when you are panning and following the subject and attempting to keep it located at the selected AF point. Note: you need to keep the shutter button half-pressed in order for the continuous focusing to occur. Note: Depending on your setting of Custom Function (a3 Focus tracking with lock-on) the camera can pick up and start tracking a new subject that falls under the selected AF point.
9-Point Dynamic-Area AF will use the immediate surrounding AF points to help maintain focus on a subject that briefly leaves the selected AF point. This can be used with predictably moving subjects like a car or a runner.
21-Point Dynamic-Area AF will use even more of the surrounding AF Points, more than half the total AF Points. This should be used for more unpredictably moving objects like sports players on a field.
39-Point Dynamic-Area AF will use all of the 39 AF points. It can be used for very quick and unpredictably moving subjects like animals, birds and wildlife.
The Dynamic-Area AF Modes are not used to track and maintain focus on a subject that is moving across the various AF points in the frame, but rather are used to stay focused on a moving subject that you attempt to keep located at your selected AF Point. To track a subject that is moving across the frame, intentionally passing from one AF point to the next, use 3D-Tracking.
3D-Tracking
This mode is used for subjects moving across the frame in any direction, or subjects moving erratically from side-to-side in the frame, and they are tracked by areas of colour (if the colour area you wish to track is too small or if it blends into the background you may get unpredictable results). Use this when you don’t wish to necessarily pan or follow the subject to keep it located in the same part of the frame, but rather when you wish to keep the camera relatively still as the subject moves across the frame.
Phalaenopsis Orchid – Stacks of Focus…
by Rodney Campbell on Oct.29, 2012, under Life, Photography
I noticed that my neighbour had this absolutely lovely Phalaenopsis orchid so I decided to “borrow” her plant for a little while whilst I tried some more experiments with the technique of focus stacking.
This particular plant had quite small delicate flowers (probably not much more than one and a half centimetres across) and all of the buds looked to be almost perfectly formed without many noticeable bad bits.
I took it outside so I could photograph the flowers with some nice swashes of blurred background colour (grass, sky, etc) and also have some late afternoon sun behind the flowers. I shot all of these using the Nikon 105mm f/2.8 VR 1:1 macro and my Nikon D600 locked down on a tripod.
Note: These images (especially the wider shots) look much better when larger – so click any of the images below to see larger versions in an inline overlay slideshow gallery viewer.
To see how little depth of field you might get when shooting semi macro images and why focus stacking is useful in these situations…
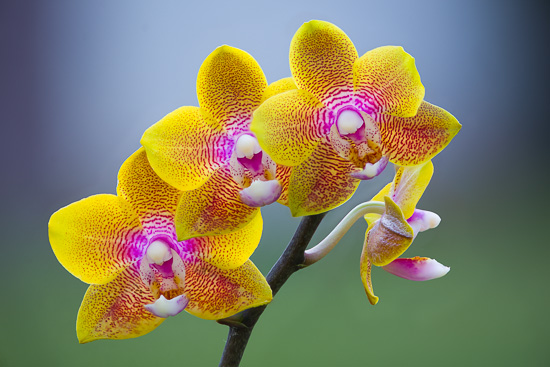
First up the result of focus stacking 35 images taken at 1/200 sec @ f/4 and ISO 200
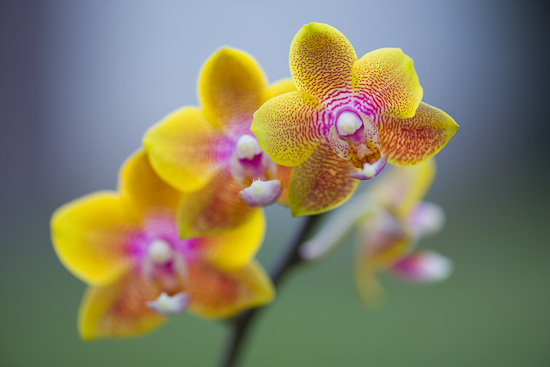
secondly here is one of the single frames taken at f/4 and you can see that the depth of field doesn’t even cover a single petal let alone the whole bud or the set of buds…
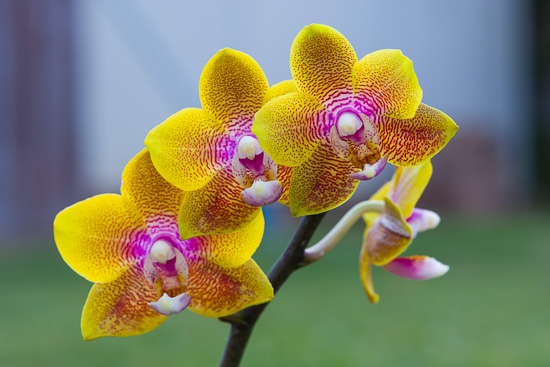
lastly here is a shot of the same composition stopped down to f/16; you can see I’ve obtained a reasonable depth of field which almost covers the major portions of a single flower but it’s still really not sharp and the rest of the composition falls out of focus…
Another result of focus stacking 40 images taken at 1/125 sec @ f/4 and ISO 160
and the comparison shot stopped down to f/16 – here you can even begin to see the texture of the closer background grass and the bokeh isn’t all that nice…
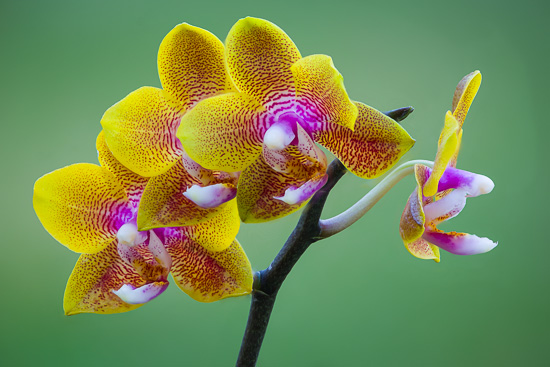
Finally a single bud, the result of focus stacking 22 images taken at 1/125 sec @ f/4 and ISO 100
Sydney Lunchtime Rush… or not…
by Rodney Campbell on Oct.27, 2012, under Life, Photography
Weekday lunchtimes in the heart of the Sydney CBD are normally a crazy, jam packed affair with a sea of office workers milling through the streets. I headed out from the office with the new D600 and just the 85/1.8 with a view to capturing something which completely DIDN’T reflect this 🙂
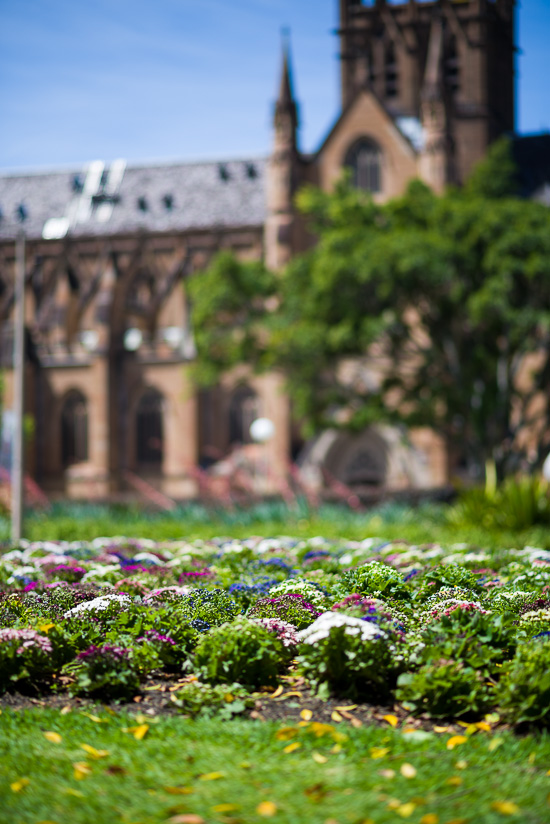
Hyde Park looking towards St Mary’s Cathedral
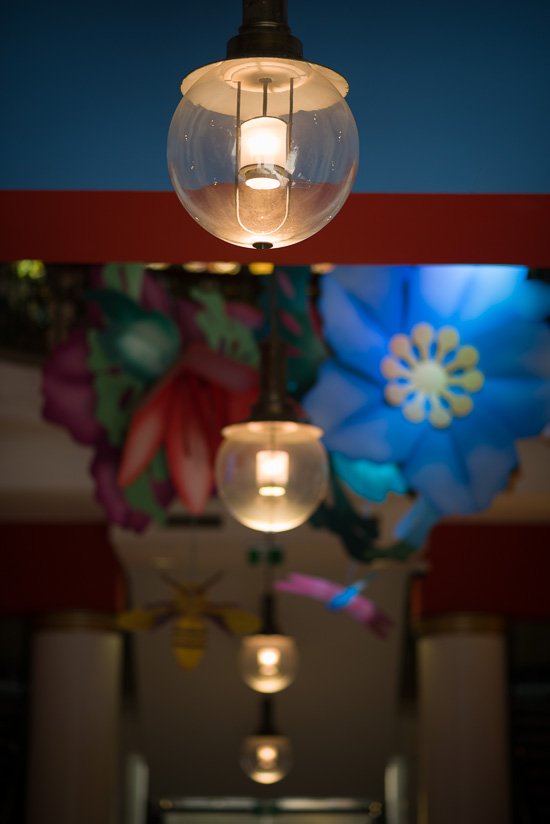
Actually this food court which lies underground at the Galleries Victoria was teeming with activity at the time (I’d just had lunch at the very nice Chat Thai – highly recommend it if you’ve never been)
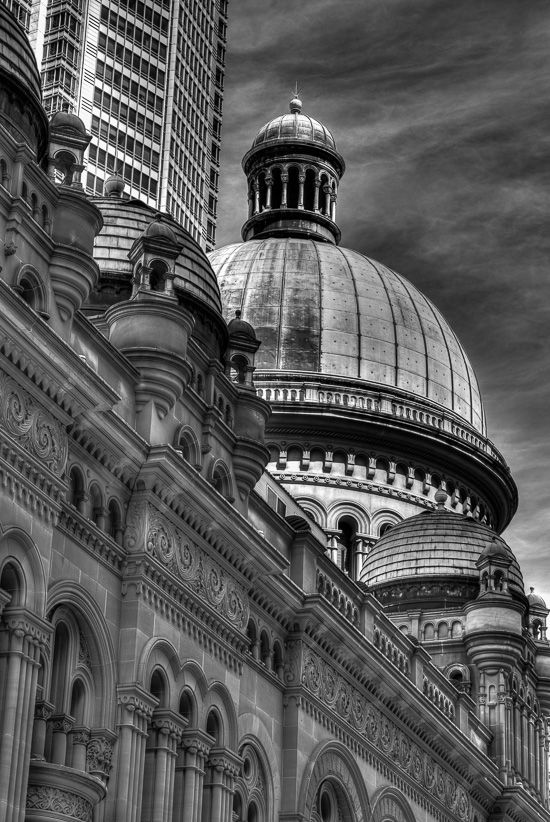
and of course you can’t go past the ever present QVB… outside…
What’s Old is New
and in
What Sunrise?…
by Rodney Campbell on Oct.25, 2012, under Life, Photography
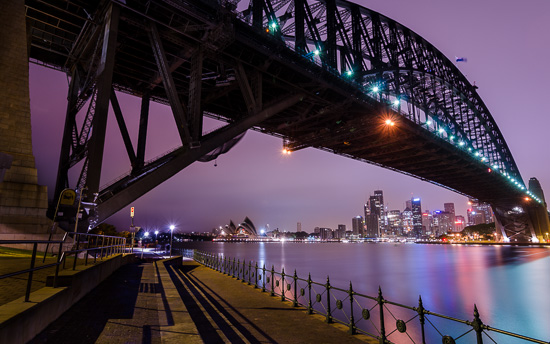
Joined the FOCUS crew down at Milsons Point on Sydney Harbour for a dawn and sunrise shoot under the bridge.
The early morning started with a 4:30AM arrival under the bridge (yeah daylight savings started the next day… sigh…) – the cloud cover was complete and it was drizzling – not looking promising. However the company couldn’t be faulted and I even tried (and failed) with a bit of pre dawn lightpainting (the ambient from the street lights and other city lights killed everything).
Note: These images (especially the wider shots) look much better when larger – so click any of the images below to see larger versions in an inline overlay slideshow gallery viewer.
4:45AM – about 45 minutes before sunrise – the light pollution from the city lit up the low cloud cover for some colour in the sky
Sydney from the Park
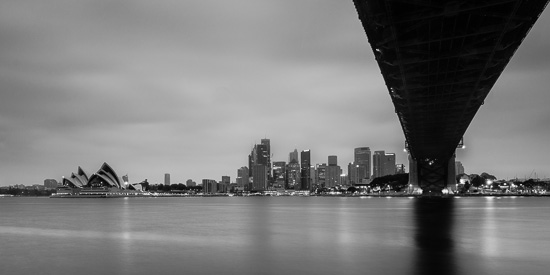
and check out the great colours and clouds we got in the sky with sunrise!… yeah right!… 🙂
Grey Harbour Dawn
Arca Swiss L-Bracket (Plate) Options for the Nikon D7000…
by Rodney Campbell on Oct.21, 2012, under Life, Photography
I’d originally written this about a month ago and planned for something for my D7000 – now I’ll have to restart my research for the D600 🙂
I’d been thinking of getting an Acra Swiss style L-Bracket (L-Plate) for some time now and am thinking of purchasing one and seeing how it goes.
First up to set some expectations:
– I have a Nikon D7000 (and a D90 which I don’t use much :)) and I guess in future I may upgrade the body (D600 maybe :))
– I often shoot landscapes/seascapes (& macro) and do shoot quite a few verticals so the L-Plates prime ability to switch orientations without having to flop over the ballhead is attractive
– I often use a wired remote release (even my wireless one still plugs a dongle into the wired side port) so I *need* to still be able to open and access the small lower side door of the camera (don’t really care about the large upper door). I’m presuming that even with the door open and the cable in I can still mount the camera vertically more towards the edge of the arca clamp with the cable going past the clamp edge
– Note when I say I want to be able to open the side door with the plate on I don’t mean open the door first and then put the plate on (which all can do) but rather leave the plate on and open and close the side flaps whenever I want
– The intent would be to use the L Plate as per expected and leave it on the camera almost permanently (unless I mount the Battery Grip which is like maybe twice a year)
I’m aware of at least the following L-Brackets which should fit the D7000 (in decreasing order of price):
Kirk BL-D7000 US$130+Delivery
– has filed semi circles in the side rail right where the door flaps are presumably to assist opening those doors – but it’s web site says – “We recommend the use of the Nikon ML-L3 Remote Controller with this bracket” – which to me basically says you can’t open the doors with the plate on, and no stop screws
ReallyRightStuff BD7000-L $US120+Delivery
– people I know with this plate say you cannot open the side doors with the plate on and no stop screws
Sunwayfoto Universal L Plate Wide Base DPL-04 (or DPL-03) US$89+33
Hejnar Photo D7000 L Bracket US$90+20
or his Universal L Bracket for the same price
– is also D7000 specific but doesn’t look to be body hugging as other D7000 model specific plates and no stop screws
ProMediaGear PLND7000 US$90+13 (via eBay store)
– also has filed side rails where the door flaps are – however a reviewer indicated he couldn’t open the door flaps with the plate on, has stop screws on bottom and side rails
The upside for most of the D7000 model specific plates are they fit like a glove on the D7000, the downside is that they basically can’t be reused on other camera bodies and there appear to be issues with most models where you can’t (or it’s extremely difficult to) open the side doors in the field (and if so could be a deal breaker for me)
An upside with the two part plates is you can use the lower plate by itself (like a standard arca plate)
The upside for the universal plate (and even some model specific two part plates) is you can often use it on other bodies and most also allow you to slightly offset the side plate further from the body allowing you to open the side door – however you don’t get a snug fit and having the side plate offset quite a way (one or two cm) from the side of the camera is likely to be crap in practical every day terms
I also recently ordered the Sunwayfoto DLC-50 50mm Duo-Lever Adjustable Arca Clamp and the Sunwayfoto 56mm Camera Body Arca Plate DPG-50U to try (hasn’t arrived yet) – trying both the brand and the idea of using a lever style clamp (hedging my bets here because this clamp can be used either as a lever style or traditional screw type (which my existing one is)). I have multiple tripods/monopod and only one is currently Arca compatible and I plan to convert all to Arca and add plates to my cameras and lenses.
