Archive for October, 2013
D600 – New Shutter – Same Spots…
by Rodney Campbell on Oct.18, 2013, under Life, Photography
I often shoot landscapes so am generally shooting stopped down for depth of field and do sometimes include flat expanses in the images (e.g. skies, smoothed water, etc) where I do notice the spots in my images.
When I dropped my D600 and subsequently had it repaired one of the practical upshots of this was that I had a completely new shutter assembly installed. The Nikon tech at the time did mention to me that I got the “new and improved” shutter mechanism that “fixed” the problems with it throwing crap onto the sensor – the one going into all the newer cameras from the factory.
For various reasons I had to return the camera for repair a number of times before eventually getting a completely working camera back again (a post for another day perhaps – sigh). What this did allow me to see however was each time I got the camera back and used it I could see I was having the same spotty sensor issue like I had with the original D600 and each time I had to return the camera back to Nikon for them to fix something I also mentioned I was getting dust spots on my sensor and they dutifully cleaned the sensor as part of the job.
OK I’ve got my D600 back for good now and I’m still getting spots so I decided to do some testing.
Note: Please don’t let this sound like a rant or disuade you from using this camera – I absolutely love my D600 – I think it’s easily the best camera I’ve ever used. In my normal shooting I change lenses a lot, outdoors and in whatever conditions I’m in. I expect to get dust on my sensor and I clean when I need to (have done in the past with my previous cameras) – it’s just that the D600 (esp early in it’s shutter life) gets noticeably more. We also get more of the oil/lubricant splatter type spots rather than just the usual dust spots. Splatter spots are semi-transparent, tend to be large and either circular or slightly elliptical in nature, they sometimes have slightly more transparent centers, and the edges are sometimes not well defined.
– First I ran the camera through Reikan Focal’s “Dust Analysis” testing and reporting routine as a baseline of before
– Second I setup the camera on a tripod with a prime lens (my 90mm macro) set to manual infinity focus and f/16, ISO 100 pointed at a white wall, image review off – I took a couple of “before” test shots – note also that I’ve taken just over 2000 shots with this new shutter so far
Before
Shutter Count 2073
– Next I cleaned my sensor – both a Rocket Blower job followed by a full wet clean of the sensor using my Copper Hill Sensor Swipe and checked the sensor using a sensor loupe
– I then put the camera back onto the tripod and setup an intervalometer to take a shot every second for an unlimited number of shots and let it run – about 3600 shots later the battery expired
– I changed the battery for a fresh one and then let it go again – another 2500 shots
– so all up I took over 5000 shots without moving the camera or changing lenses, etc
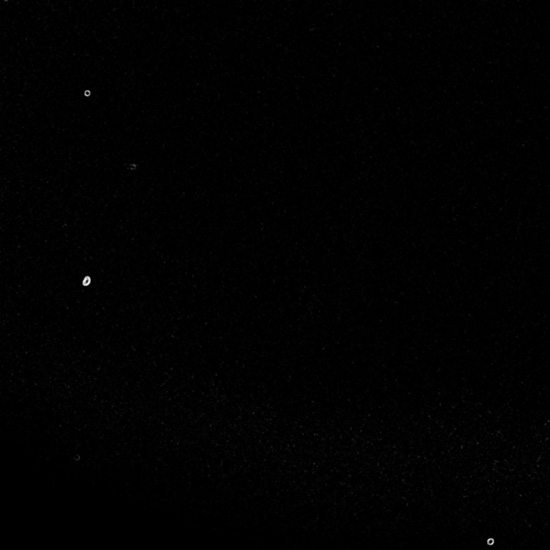
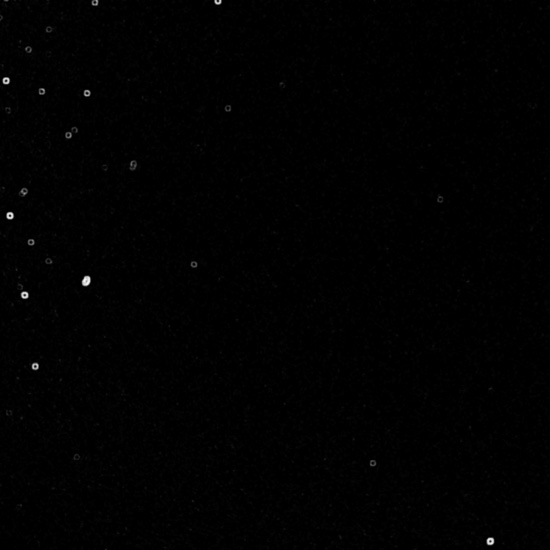
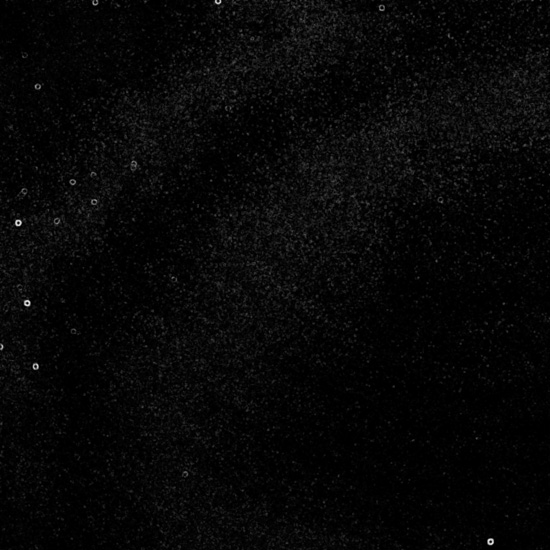
I took a selection of the images into Lightroom and did a bunch of common adjustments to all the images to highlight the spots and then switched into Lightrooms spot removal mode and turned on the visualise spots function. I then screen captured a square crop of the left side of each of the frames – the far left side and more towards the top left corner is where most of the spot action takes place on the D600. Note these adjustments make them much more obvious than they otherwise would be in normal processing/images
I then made an animated GIF of the sequence of images to show the transition over time so you can see the crap the shutter throws up onto the sensor (primarily in the top left corner of the image area)
The images in the animation include:
– first shot after cleaning (even this has one spot – middle bottom of frame) – I don’t know if this was there before or whether the first shutter action created it [Note that this shot is actually this camera’s Shutter Count 2076]
Clean 1st
– second, third and fourth shots after cleaning – even here you can see a number of new spots appearing straight away
Clean 4th
– after that I show every hundredth shot onwards from 100, 200, 300 and so on up to the 2400th shot
2400th
– I don’t bother with more in the middle but then jump to the 3700th shot and every hundredth shot from there 3700, 3800 and so on up to the 5100th shot [Note that the last shot is actually this camera’s Shutter Count 7182]
3700th
5100th
I then cleaned my sensor again
Some further notes:
– it almost looks like things may have gotten better after around the 3-4K mark (5K+ actual shutter actuations) – fingers crossed we may have passed the initial problem period?
– the camera seemed to be fine for the next shoot I did – I didn’t notice any obvious spots yet
Rising Sydney – A Quadriptych…
by Rodney Campbell on Oct.16, 2013, under Life, Photography
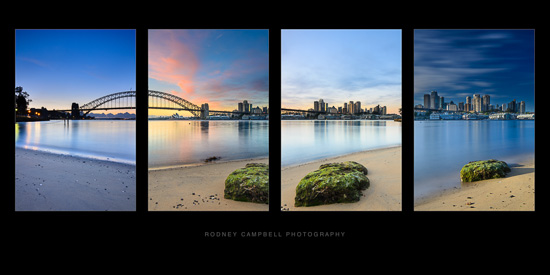
A quadriptych put together from some images taken early one morning at Blue’s Point. These images span from 25 minutes before sunrise right through sunrise to 50 minutes after sunrise.
Note: These photographs (especially the wider shots) look much better when larger – so click any of the images below to see larger versions in an inline overlay slideshow gallery viewer.
64 seconds @ ISO 200 a twilight blue hour long exposure; 3 seconds @ ISO 100 right on sunrise; 15 seconds @ ISO 100 ten minutes to sunrise; 245 seconds @ ISO 100 a bigstopper long exposure 50 minutes after sunrise
Rising Sydney – A Quadriptych
A Slow Sunset Opera…
by Rodney Campbell on Oct.14, 2013, under Life, Photography
OK amidst the inundation of International Fleet Review imagery I figured I’d put something in my stream more in my usual style 🙂
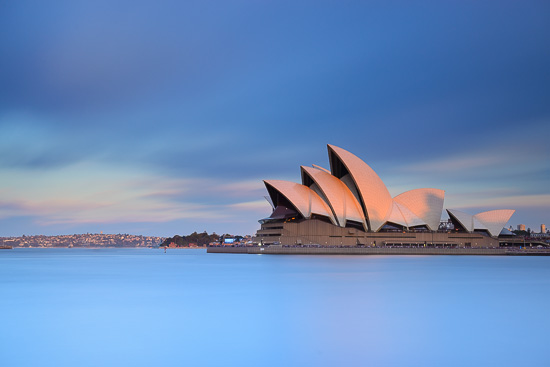
Whilst waiting for the epic light and fireworks spectacular, I was hoping we’d get some nice sunset colours (with me looking east (away from the setting sun) towards the Opera House from my location at Dawes Point).
So how do you simplify the scene and get rid of a harbour full of hundreds and hundreds of boats, ships and other water craft, not to mention helicopters and planes in the sky, without having to resort to an insane amount of cloning? Why an insanely slow shutter and a very long exposure of course. This shot is about 15 minutes before sunset and I left it running whilst I went away to do other things (setup a remote camera at the top of the projector tower).
Note: These photographs (especially the wider shots) look much better when larger – so click any of the images below to see larger versions in an inline overlay slideshow gallery viewer.
Here we have a lazy 367 second (more than six minutes) exposure in falling light and it remarkably turned out as I’d hoped pretty much straight out of camera. With the last kiss of amber light from the setting sun hitting the sails and lighting the lower clouds, and at the same time almost all the moving vessels have vanished from my frame.
A Slow Sunset Opera
RAN – Navy International Fleet Review & Fireworks…
by Rodney Campbell on Oct.11, 2013, under Life, Photography
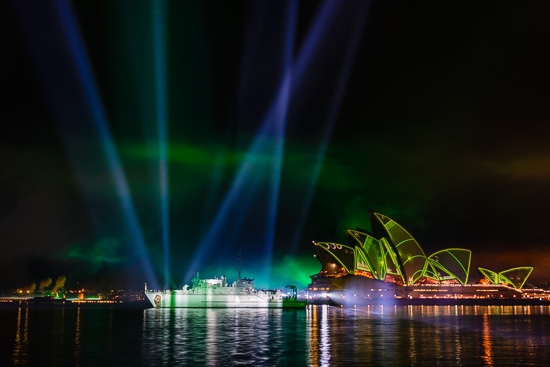
Had a prime position on the waterfront at Dawes Point for the fireworks and lightshow spectacular as part of the Navy International Fleet Review.
Even though I could shoot from anywhere in the private area where the tower hosting all the equipment for the light projections, the sharpy light cannons to light the Navy ships in the harbour and the sound equipment it was a tricky location to shoot from primarily because all that equipment was there.
Our brief was to photograph the projections onto the sails of the Opera House (during the light show) and ideally show them in the wider context of the overall light and fireworks spectacular and the rest of the scene on the harbour – however this proved to be very tricky.
– the incredible brightness of the fireworks (and I really wanted to use a longer shutter at a lower ISO to capture the fireworks properly)
– the lit Navy ships (which two huge banks of about 40 sharpy light cannons at our location were lighting this side of) – and man are these things bright! – I ended up positioning myself directly in front and a metre or so below the bank of lights lighting the ship (HMAS Gascoyne) out in front of the Opera House
– and the bank of sharpy light cannons that often pointed directly towards us from the Opera House (lighting the other side of the ship)
– if that wasn’t enough both of these light cannon installations had smoke machines in them which kicked in during the event (a surprise when it all started billowing around me :))
Trying to balance the exposures of all the above with the projections onto the Opera House was pretty much impossible. Basically I needed ISO 800 f/5.6 and less than one second to expose and have a static image on the Opera House but the fireworks needed ISO 100 f/11 and about 2 seconds to do them justice and nothing would cope with the light cannons directly into the lens.
So my keeper rate during the live show was pretty low but I came away with a few shots I liked
Note: These photographs (especially the wider shots) look much better when larger – so click any of the images below to see larger versions in an inline overlay slideshow gallery viewer.
Naval Fire
This one actually took a bit of work in post processing to get it to look like this :). It’s actually a manually blended composite where I’ve exposed one frame for the Opera House and yet others for the fireworks and Navy ships and then since I’m editing anyway I’ve added the partial reflection at the bottom (which had to be done in three sections since there was no single flat horizon line)
All Guns Blazing
Searchlights
HMAS Sydney
Monochrome – Steps to There…
by Rodney Campbell on Oct.09, 2013, under Life, Photography, Street
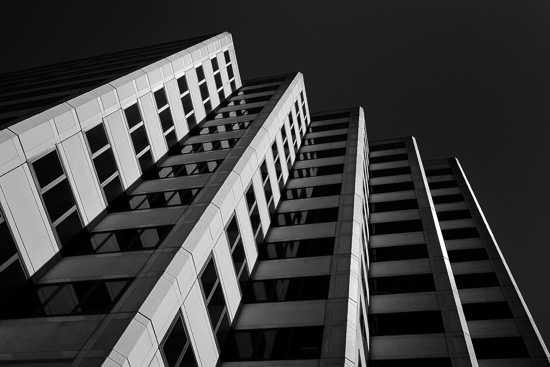
This is actually just a quick location test shot for a longer term personal project I’m working on (more about this later :)) which I took the other day when walking past this spot. I only had the 35mm prime on the camera at the time but I was happy with this composition and the resultant monochrome conversion of what was ostensibly a test frame.
Note: These photographs (especially the wider shots) look much better when larger – so click any of the images below to see larger versions in an inline overlay slideshow gallery viewer.
Steps to There

