Tips for Creating Great Panoramas…
by Rodney Campbell on Aug.02, 2014, under Life, Photography
I’ve been creating stitched panorama images for a very long time. My first panorama attempts started way back in 2001 with some of the earliest digital cameras including a Nikon Coolpix 900, then 990 and 995 compact cameras
The principles for taking good source images for stitched panorama’s has essentially stayed the same – most of the improvements have come with the ease of stitching and the power of modern software to compensate for less than ideal conditions
Simplistically the idea with panorama stitching is that you take a sequence of images which overlap encompassing a wider view than is possible with a single image frame and then you seamlessly blend those images together in software to create a single seamless image covering the entire view
The scene you cover may go anywhere from two images side by side all the way to multi row and multi column sets of images which may cover a full 360º wide (full rotation) or even a full 360º spherical (covers every direction) view
For this tutorial I’ll limit the discussion mostly to single row panoramas – where there is just one row of side by side overlapping images across a scene (although you can also do this vertically for a vertorama)
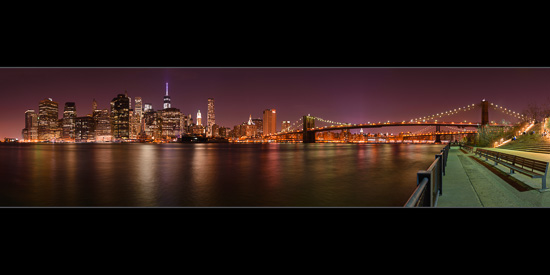
New York Cityscape
The Basics:
Having a Level “horizon”:
You can take the frames on a tripod (ideally) but handheld often also works well. What you want is for the sequence of images which will be stitched into a wider panorama to be taken across a level “horizon” as you rotate the camera around
What happens if you don’t do this – you may find that your joined images stairstep as they go across (and if you’re doing a full 360º panorama the ends do not meet up) and you end up with a sort of diagonal panorama. What you really want is for your resultant stitched panorama to be a nice rectangular frame with the top and bottom of each of the source frames lined up across this
The easiest way to do this is to just have the “horizon” go directly across the middle of the frame for all the images as you rotate (works well when images are taken handheld). If you are using a tripod then you ideally want to level the tripod (or rather the base of your tripods head) so that it is level all the way around. Thus any camera sitting atop this level base will remain level (perfectly vertical) as it is rotated around
Technically modern software does allow you to compensate a lot for this – e.g. with Photoshop’s Adaptive Wide Angle filter – however I find things go a lot more smoothly and much quicker overall if you just take a little more time at capture time and get things as level as you can
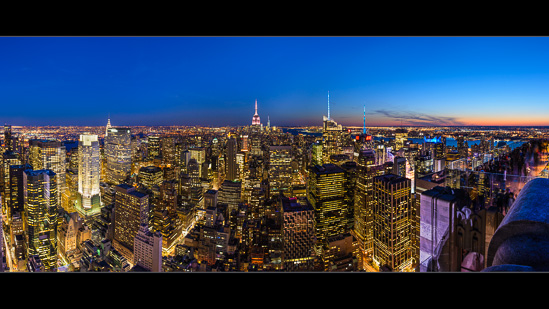
Rock the Night
Tripod & Head:
Speaking of tripods – it is much easier to use a tripod head which has some form of panning base (where the top part of the head can rotate around the full 360º of the base of the head). Personally I (like most people) use a ball head for my landscape photography, and most ball heads do have a panning base with degree markings for rotation on them
A ball head does introduce one difficulty however for panorama’s in that you also need to have the ball stem as vertical as you can so that the plate which sits level on top of this (and thus the camera on top of the plate) remains levelled all the way around when it is rotated. This can be hard to do since ball heads do not have a “central” position but rather are designed to move freely in any direction/angle
It’s doable but it means you have to spend some time out in the field setting your tripod and ballhead up before taking the frames for the panorama. Essentially I would have to get the tripod (base of the ballhead) as level as I could (generally by eye or many tripods also have a bubble level at the top of the legs/base of the head). I would then try to level the plate sitting atop my ballhead (so it stayed level throughout the rotation of the expected panorama). Many plates also have bubble levels on them – however in my case my camera has a built in two axis electronic level and I would turn that on and view the results as I rotated the camera and adjust the ballhead and the tripod legs till I got everything level all the way around
This could be time consuming and painstaking – recently I purchased a new Ball Head and I decided I do enough panoramas to make it worthwhile getting something to specifically make it easier
There are a whole lot of gear accessories designed to assist with taking panoramas from levelling bases, nodal slide rails, panoramic heads, multi-row arms and so on
The problem with most of the panoramic accessories is that they are quite large and heavy and many you don’t want to leave permanently attached to your tripod (because of the size/bulk and bits sticking out everywhere). You basically have to detach your tripod head out in the field and do surgery to attach all the relevant bits before taking your panorama. I wanted something I could leave permanently in place but didn’t excessively add to the size and weight of my setup (yeah I know have my cake and eat it too :))
In the end I oped for the Really Right Stuff BH-40 PCLR – their mid-sized ballhead with lever-release panning clamp – it’s only really good for single row panoramas but it’s perfect for my purposes because it totally simplifies the levelling process out in the field – I don’t have to bother getting my tripod level, or the ball head, nor manually getting the stem of the ballhead perfectly vertical – I just level my camera in one position and the rotating pano clamp at the top stays level all the way around – genius
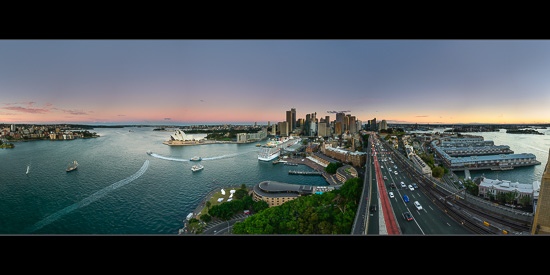
Pastel Harbour
Take Vertical Frames:
For a single row horizontal panorama I suggest taking all the source frames vertically (in portrait orientation). When making a stitched panorama you don’t generally have an issue with the width of your panorama – you just take enough frames to cover the field of view you want. However when taking a single row panorama the height (in field of view and in actual pixels) is controlled by the height of the frames you take – using vertical frames gives you more vertical field of view and more vertical pixels in your final panorama to play with
Overlap 50%:
I’d suggest overlapping your frames by roughly 50% – others advocate at least 25% or 30% but I find 50% works well for a number of reasons
Firstly it’s just easier – when I’m shooting panoramas and you have to figure out how far to rotate to the next frame – I simply look at something that’s in the centre of the current frame and rotate the camera till that object moves to the edge – voila a 50% overlap
When using wide angle lenses the edges of the frames are generally distorted. The stitching software will often detect the lens parameters used (e.g. focal length) and “correct” the distortion. When the images are laid out next to each other and stitched you’ll generally find that they form a multi scolloped shaped edge along the top and bottom with dips where the corners of each frame are – if you use a larger overlap of 50% these “dips” into your image area will be smaller and you’ll end up with an overall “taller” image with more vertical pixels when the final panorama is cropped
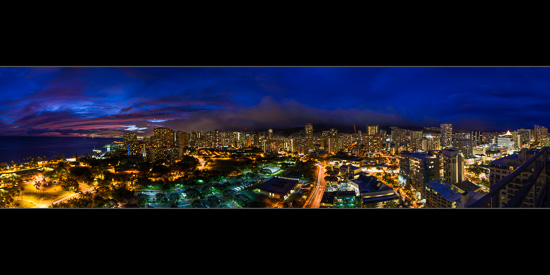
Oahu Dreaming from Level 26
Parallax:
Parallax is a displacement or difference in the apparent position of an object viewed along two different lines of sight, and is measured by the angle or semi-angle of inclination between those two lines
Basically this is only a problem for objects in your scene which are quite close to the camera (especially with things much further away behind them) and it generally results in the areas around those objects not stitching properly in the final panorama
Typical examples of some problem items would be rails from a balcony or fence directly under the camera or a tree trunk right next to the camera
There are special panoramic components you can use to assist in solving this issue – e.g. nodal rails, etc. However in the real world I rarely find this is significant problem unless you have objects in your scene very very close to the camera. You can avoid most of the problems by rotating your camera around as close to the centre of the lens (centre of the camera) as possible and also by not placing objects close to the camera in your composition
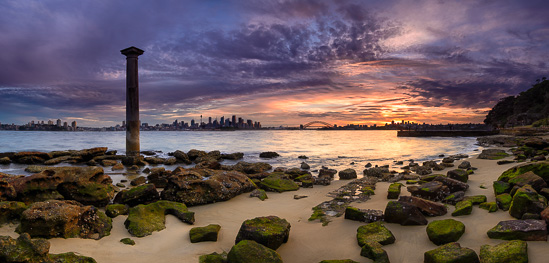
Bradleys Sunset
Camera Settings:
Focus:
I’d suggest setting and locking the focus for the sequence of frames. Treat it like any other landscape shot – focus at around the hyperfocal distance (either manually or using auto focus on an object at roughly the right distance or via liveview) and then switch the focus switch to manual and don’t touch the focus ring
Exposure:
I’d suggest shooting the panorama frames in (M)anual or (A)perture priority mode. You want to have the Aperture stay constant across your frames (because you want depth of field to stay constant). Ideally you also want the overall exposure to stay even across all of the frames so shooting in manual and locking down Aperture, Shutter Speed and ISO (and White Balance) across all the frames. If you shoot in RAW you can easily adjust and synchronise the White Balance between frames in post
The reason you want to have consistent exposure is you don’t want the exposure of objects in the final panorama to be jumping drastically between frames (e.g. an object is well exposed in one frame, it’s a silhouette in the frame on one side and blown out on the frame on the other side) – these just won’t blend well. One place where you’ll really notice exposure differences is in flat areas of colour in your scene – e.g. the sky. The sky normally should be relatively smooth toned across the sky – and doesn’t look right when there are obvious bands of drastically different blues or other colours across the sky in your final panorama
To set the “correct” exposure to use across all your frames I generally look through the viewfinder with my chosen Aperture set in Aperture priority mode (with Auto ISO off) and then slowly rotate the camera around the selected scene and half press the shutter button every now and then and look at the shutter speeds the camera’s metering system is telling me to use. If the extremes of the range isn’t too far apart I’ll generally opt for a shutter speed near the faster end (so that I don’t end up with any very overexposed source frames where all highlight detail is blown out)
This tends to work for normal daylight scenes where I’m not looking right at the sun at one part of the panorama
There are times however where using a single exposure across all your frames just doesn’t work – when there are large ambient exposure differences across the panorama view. For me I find this happens around sunrise and sunset and especially when doing long exposure panoramas during twilight. The reason for this is that during sunrise/sunset/twilight the light levels are changing rapidly over time and with long exposure frames the level of ambient light can change dramatically between consecutive frames let alone across a whole sequence of frames
With a daytime panorama you generally don’t need to be concerned with changing light so to get consistent exposures between all the frames you generally just shoot in manual and fix a “mid” exposure across all the frames
With a panoramas at the start or end of the day you can have massive variation in light levels across the exposures – for at least two reasons:
– those exposures which face towards the sun are many many stops brighter than those facing away from the sun
– when each of the long exposures can be many minutes long, if you need to take a number of exposures (and I’ve sometimes needed to take upwards of 20+ with a long focal length) by the time you’ve taken just one set an hour or more may pass and you’ve gone from daytime to full night and the light levels from one side of the pano to the other can have insane variations. Sometimes by the time you’ve moved from one frame to the next the light might have changed by a couple stops
Pro Tips: my technique to cope with these problems is to:
– If it’s sunset start at the end of the pano which will end up being the darkest by the end of taking the sequence of shots (away from the sun) and finish where it will be the lightest (towards where the sun set) – that way the darkest side will be the lightest it will be at the time you shoot it and conversely the lightest side will be the darkest it can be by the time you shoot it. If it’s sunrise do it the other way around – start where it’s currently lightest and move around to where it’s currently darkest but it should hopefully lighten up by the time you get there
– adjust the exposure between frames (generally by adjusting ISO and maybe shutter length or gasp aperture) to compensate between frames to get relatively consistent exposures across the set
Some more examples of some long exposure panoramas:
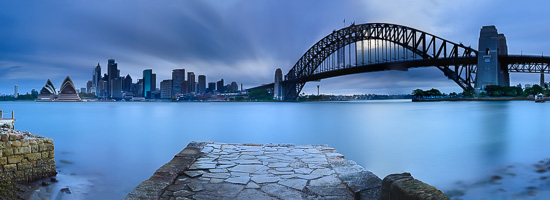
Shooting two minute exposures with my Lee 3 stop grad along with the 10 stop ND, the light levels were going all over the place with the sun intermittently coming in and out of the overcast clouds. I ended up going back and reshooting many of the individual frames and adjusting my ISO between 100 and 400 “by feel” to try and get relatively consistent exposures for the frames.
Truth be told I held very little hope that this was going to work and by 7:15 after having spent nearly 45 minutes taking 16 frames I practically gave it up as a lost cause. Back in Lightroom I selected the best nine adjoining frames and adjusted them as best I could for consistency and let Photoshop have a crack at them. Much to my surprise… it worked…
Longing for Kirribilli
Cracks in Space
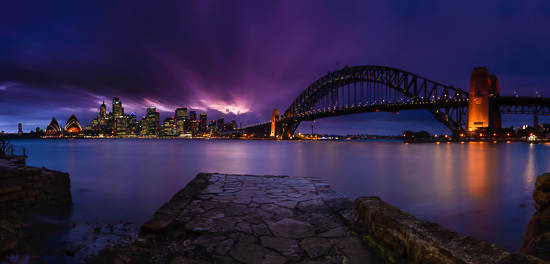
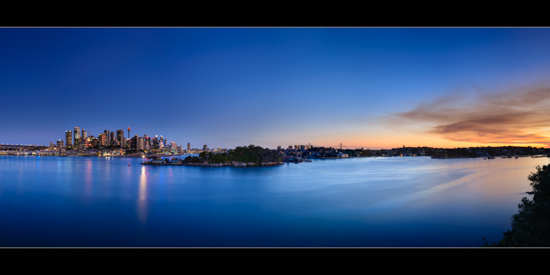
Almost thirty minutes after sunset and we’re well into twilight blue hour with this eight (8) frame panorama. With very long exposures for each frame it takes some time to complete the whole set – and the light was noticeably dropping fast so I was manually increasing the exposure time for each frame chasing the light as I went to compensate – I started at just over 30 seconds for the first frame on the right and by the time I’d rotated around to the last frame on the left I was out to many minutes
Chasing the Light
