Olympus Night Photowalk…
by Rodney Campbell on Sep.21, 2014, under Life, Photography
Thanks to my friend Mykal Hall who’d pointed out that Olympus were running some night photo walks from the mouth of Luna Park Sydney to Bradfield Park as part of The Digital Playground event at Luna Park here in Sydney over three days. Olympus would have a set up of camera’s and lenses to try out including the OM-D & PEN cameras.
As I was already attending the three day photography conference at The Digital Playground and I’ve been somewhat tempted by the diminutive size and weight of these little pocket marvels in the OM-D series I saw this as a good opportunity to try some gear out.
I signed up for the Saturday night walk and headed out with the pack. I borrowed one of the new Olympus OM-D EM-10’s (the new entry level OM-D) and being a landscape shooter I started with one of the wide zooms – the kit 9-18mm f/4-5.6 (for an effective focal range of 18-36mm). I figured as I’d be shooting it stopped down anyway it might be ok.
Note: These photographs (especially the wider shots) look much better when larger – so click any of the images below to see larger versions in an inline overlay slideshow gallery viewer.
One of my main concerns with the micro four thirds system is the lack of good ultra wide angles (with a front filter thread) – something down at the effective 14 to 16mm range (so 7 to 8mm). It’s not just about achieving a wide angle of view either – the difficulty with really extreme wide angles (like 7mm) is having a halfway decent corrected image (one which isn’t abnormally stretched at the sides, crazily distorted, oodles of CA, etc) because it’s hard to get the light to bend so extremely and all (wavelengths) come together in focus on the sensor.
Anyway this isn’t a review on the system – I only got an hour to play… After a quickfire 30 second tutorial on using the camera I was away.
I shot pretty much in manual (and in Olympus RAW + JPEG) – it was sunset/twilight/night and I wanted to do long exposures
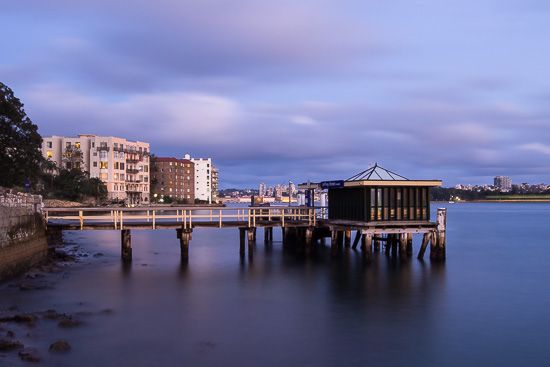
This first shot I had to stop down a lot more than I would have liked (f/22) to get the 30 second exposure I wanted – I also had to drop down to the low ISO (100) – the native on these cameras seems to be 200. The original image is noticeably soft (esp on my big screen in Lightroom) – adding tons of selective clarity and sharpening has helped quite a bit but it’s still not great. When I mentioned my concerns with diffraction at f/22 the Olympus guy said because of the design the camera/lens it doesn’t suffer diffraction (or rather it’s automatically corrected (in software?)). However I find this “unlikely” given the pixel density & pitch (16MP on the small sensor) and well physics – I think he was possibly referring to chromatic aberration?
Olympus Jetty Set
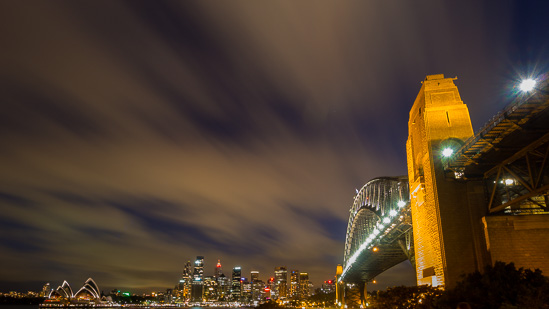
This one is a two minute exposure at a more reasonable f/11 still at the low ISO 100 shot at maximum wide of 9mm. Again I can tell it’s nowhere near as sharp or corrected as my 16-35 on the D600 but for the tiny size it does a pretty spectacular job.
Olympus Bridge View
A couple neat things with these OM-D’s – the max shutter speed (without having to go to bulb) is 60 seconds (not 30 like most cameras) which is useful for those without a remote trigger (like me here). Also it has a number of modes specifically for long exposure shooters – Live Bulb, Live Time and Live Comp.
The live view screen is updated during exposure (up to 24 times at a set interval). Live Bulb opens the shutter while release button is pressed and Live Time opens the shutter on the first push and closes it on the second push. During Live Bulb mode, the exposure time and histogram are displayed on the screen.
Live Composite is like Lighten blend mode in photoshop. It composites images in lighten mode so that it can capture starscapes without over exposure unlike normal bulb shooting. It is, for example, useful to capture beautiful star trails, fireworks and fire flies in the background while shooting a bright building in the fore ground. As with Live Bulb, you can check the progress on the LCD monitor.
I played with both Live Time and Live Comp and I could see how these could be useful addition to a long exposure and light painters arsenal – although it would take some of the iteration and serendipity out of the experience.
I then switched to the 12-40mm f/2.8 Pro lens (a 24-80/2.8 equiv) and tried some more cityscapes. The lens is definitely meatier and feels nice and solid in the hand.
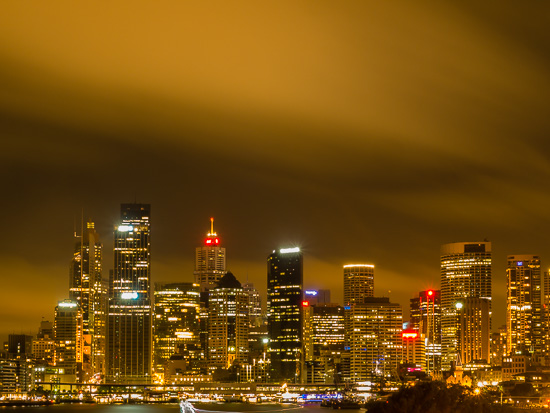
It gave some very nice results – here is one at the longer end looking across at the Sydney CBD on the other side of the harbour with the cities light pollution lighting up the low clouds. This one I shot in Live Time so I could see how long to shoot for to get a nicely exposed image – in this case a nice long 169 seconds – it certainly takes the guess work out of extremely long exposures and would be especially handy for BigStopper work.
Olympus Golden City
I couldn’t find out how to disable the long exposure noise reduction in the complex web of menu trees. I always do this on my Nikons because I can’t be stuffed waiting for double the LE time for the dark frame to also be taken – I just use Lightrooms noise reduction in post if necessary – which almost never is required to be honest since the images are so clean. This meant all the Olympus long exposures I took had this on and I had to wait a lot 🙂
That said the Olympus long exposures are noticably noisier (with LE NR on) than my Nikon D-SLR’s – in Lightroom I had to apply noise reduction to clean up the LE noise. It’s probably because with the mirrorless system the sensor is pretty much always on – not just when an exposure is taken – and so heats up quite a lot more (and sucks up battery a lot faster too I imagine).
A couple final remarks – Lightroom automatically understands the Olympus RAW files (as expected) however it appears to have no lens correction profiles for any Olympus lenses which I find surprising given their popularity. I’m sure community sourced ones are readily available but I’m surprised Olympus ones aren’t part of the standard Adobe install (I mean DJI, Fuji, Samsung, Leica, Pentax, Mamiya, etc are all there along with the big players).
I would have liked to see ISO more easily accessible (button + dial) rather than having to delve into the menu system. Switching to manual focus also isn’t a necessarily easy step (go into the menus?). The computational photography features on the other hand were very exciting and there’s no disputing the size/weight advantage.
Am I a convert… not yet… I can see the allure for travel certainly and perhaps if I had a more extensive real world play with a camera and some decent wide to short tele lenses (the 12-40/2.8 and something which reached down to 7 or 8mm with filter threading). I’d take it on some sunrise/sunset/LE/lightpainting shoots and see how it really operated and produced in real world scenarios.
I also shoot a lot of indoor and outdoor events (dance, drama & musical performances, sporting carnivals, etc) as well as childrens portraiture (which you don’t see me publicly posting very often). For this I’m normally sporting the D600 with the 70-200/2.8 and 85/1.4 (and maybe some other lenses like the 24-70/2.8 and maybe even the 50-500). This is all massive and heavy so I’d be really interested to see how the OM-D in combination with the new 40-150/2.8 (80-300 equivalent) plus a nice portrait lens (the 75 or 45 maybe?) would fare in comparison – especially for low light indoors. Two to eight hours holding up a heavy camera+lens combo is not ideal for the arms or back.
A huge thanks to Olympus for organising this – it was a great introduction into their wildly popular micro four thirds range and for people like me who currently only shoot with D-SLR’s it was great to get a look at what is out there and certainly at one of the more viable alternative options.


