Shooting Stars Technique…
by Rodney Campbell on Nov.24, 2014, under Life, Photography
A couple of days ago I started this series by covering the gear you might need for shooting stars (the Milky Way or star trails). In this post I’m going to cover some of the in the field technique and settings to use to take the images.
So What are some of the suggested techniques and camera settings for Shooting Stars:
Dark Skies
First of all you need to find a location to shoot at. For most people finding a location with dark skies is probably the hardest thing to find. The vast majority of people live in populated areas and the light pollution from our cities makes it much more difficult to get good images of the milky way.
Whilst it is possible to take passable images of the Milky Way and even better star trail images in light polluted areas (if taken with some care and planning), your best results will occur if you can go out into a remote location far away from cities.
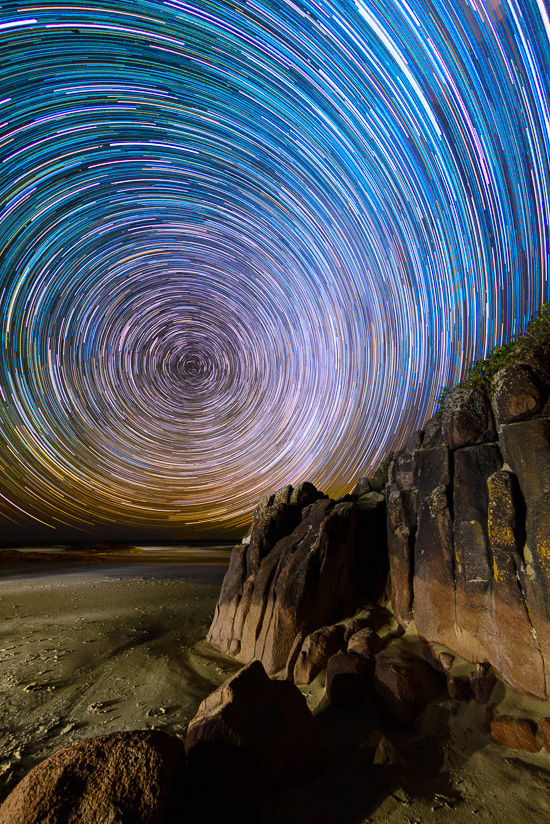
Galactic Whirlpool
NIKON D600 + 15.0 mm f/2.8 @ 15 mm, 41 sec at f/2.8, ISO 1250 x 127 Frames
Once you have a selected location you want to optimise the time and conditions that you visit.
For both stars (Milky Way) and star trails there are a few optimum environmental conditions:
– minimal light pollution (lights from the ground shining up into the sky washing out all but the brightest stars – cities are bad)
– clear skies (clouds obscure the stars)
– minimal moon (anything above about a quarter moon will both light the sky and obscure the stars (and overexpose the frame if it includes the moon)). Ideally shoot during the new moon but sometime between the last quarter and first quarter of the moon phases. This rule isn’t absolute but the closer to the new moon, the more time you will have with dark, moonless skies.
There are a number of resources to assist with finding locations with dark (less light polluted) skies including The World Atlas of Artificial Night Sky Brightness, the Light Pollution Map and Dark Sky Finder.
Composition and Focus
I’d suggest working out your basic composition first. Attach your widest fastest lens and start at the wide angle end (if using a zoom lens). Treat this like a landscape composition (because it is) – you’ll want to create a balanced layered composition with a good foreground element to go with your background.
One of the keys to good astro photographs is to not just include the sky but also some frame of reference to balance the composition and juxtapose against the enormity of the universe.
Now is also a good time to get out that star location app and work out where the stars will be. If you’re in a dark enough location you should be able to see the Milky Way with your naked eye – if you can’t then you’re probably going to be in trouble (unless you’re only planning on shooting star trails).
If you’re shooting a star trails you’ll want to know where the galactic rotation point (celestial pole) will be as the stars will rotate around this point over time. Even if you’re not just planning to do star trails and wish to take a static single image of the stars or Milky Way this will be useful information. This is because the stars rotate (and thus streak/trail) much more when pointing your camera toward the celestial equator line (away from the centre of rotation) than when pointed at the pole (centre) and this can influence your shutter speed calculations.
I like to focus beforehand and then just lock my focus to manual for the shoot. If I’ve included some strong foreground interest I’ll usually focus on that or just past that (or just focus at roughly the hyperfocal distance). For this I usually just use a strong torch to achieve auto focus and then switch to manual.
If I’m taking separate foreground shots (e.g. during twilight or via light painting) which I plan to blend later in post processing then I may adjust the focus (and aperture) separately between those foreground images and shooting the stars. In this case I’d shoot the foreground as normal with a closer hyperfocal focus and then ideally focus at infinity (or something very very far away) for just the static stars.
If I’m shooting star trails I actually like the stars to be a little out of focus since I’m creating an overall blurred line effect, so I’ll just use the foreground focus for both the foreground shots as well as the star trails shots.
I’d suggest taking test shots and zoom the LCD all the way in to check the focus of both your foreground element(s) and the stars.
Camera Settings
What follows is not a hard and fast rule but rather some good starting point settings.
Based on some test exposures you may find you have to adjust your exposure parameters depending on things like the level of light pollution, moonlight and other ambient light; your camera and lens capabilities and so on.
– RAW – I’d suggest shooting in RAW mode which captures more data and allows you more flexibility in post processing.
– Manual – set your camera’s exposure mode to (M)anual (where you can manually adjust both Aperture and Shutter Speed).
– White Balance – I suggest just using AutoWB. If you’re shooting star trails you can sync up all the images to a selected white balance later in post processing (if you shoot in RAW).
– Auto ISO – if your camera has an Auto ISO capability – turn this off and set the ISO manually.
– Long Exposure Noise Reduction – if you’re shooting star trails definitely turn this off (because it takes a dark frame for every – shot equal to the length of the shot just taken and will result in lots of gaps in your trails). If you are shooting single starfield images (Milky Way) then you may want to turn this on for cleaner images at higher ISO’s (personally I don’t bother and use Lightroom’s excellent noise reduction options in post processing if required).
– Aperture – set an aperture at or near wide open (smallest f/number). This depends somewhat on the optical characteristics of your lens – how sharp it is wide open, what level of coma it has, and so on.
Exposure
Aperture
Above we mentioned that we would shoot at or near wide open on the lens (f/2.8 or better ideally). Now we will look at the two other parameters which go into the exposure triangle – shutter speed and ISO.
It’s the shutter speed and ISO which are the predominant differences between when shooting single starfield (e.g. Milky Way) images versus taking the repeated frames for a star trails image. I’ll cover both and the differences below.
Shutter Speed
For single starfield (Milky Way) images you ideally want the stars to appear is single pinpoints of light in the sky and not to trail (appear as lines).
The shutter speed is calculated based on what is often called the “500 Rule”. This in turn is based on the focal length of your lens and the physical size of the sensor in your camera. Longer focal lengths and smaller sensors require shorter shutter speeds to prevent the stars from trailing/streaking.
The “500 Rule” works like this – divide 500 by the full frame equivalent focal length of your lens and that represents the maximum shutter speed you should use to avoid having trailing stars in your images and instead having point stars.
Some examples below:
– when using a 14mm lens on a full frame camera this leads to 500/14 = 35.7 seconds
– with a 35mm lens I’d have to stay under 500/35 = 14.3 seconds
– when using a 10mm lens on a 1.5x crop factor (APS-C) camera it’s 500/(10*1.5) = 33.3 seconds
– a 24mm lens on the same camera is 500/(24*1.5) = 13.9 seconds
– using a 12mm lens on a 2x crop factor (micro 4/3rds) camera it’s 500/(12*2) = 20.8 seconds
As mentioned above this is somewhat dependant on whether you are shooting towards or away from the celestial pole so you may need to adjust this after taking a test image and zooming into the frame to check the stars (especially near the edges of the frame.
If you are shooting star trails then the above is less important. You now actually want trailing stars so shooting for longer than the 500 rule is actually good.
Generally for star trails something in the range of 30 to 120 seconds is a likely candidate. However the shutter controls the ambient exposure – so be careful not to overexpose the sky or any light pollution. You may find in heavily light polluted areas (like shooting right in the city) you need to use relatively short exposures (much less than the 500 rule) so as to not completely overexpose the sky.
With star trails the tradeoff is between total number of images taken for a set time period (and how many you end up having to store, process and stack in software) versus how bright the background sky becomes. If you are shooting is really really dark skies you can afford to shoot longer shutter lengths and have less overall images to deal with whilst still having an ambient dark sky, conversely in light polluted areas you need to take many more shorter exposures.
ISO
The ISO is calculated based on your aperture and shutter speed but it’s a little dependent on the noise performance of your camera.
If you are shooting single starfield (Milky Way) images in dark skies you would probably start with an ISO somewhere in the range of 3200 to 6400 (assumes an aperture of f/2.8 to f/4). If you are shooting with a wider aperture you can adjust the ISO down accordingly.
If you are shooting star trails you are likely shooting with a shutter speed longer than the 500 rule anyway but I tend to use ISO’s from 1600 and below (sometimes in not particularly dark, light polluted skies I have to use ISO’s as low as 400 with an f/4 lens).
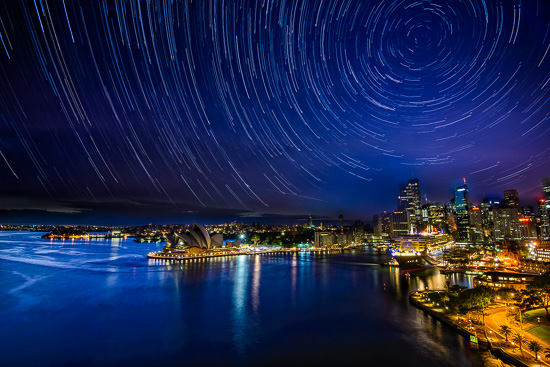
QM2 Under the Stars
NIKON D600 + 16.0-35.0 mm f/4.0 @ 17 mm, 25 sec at f/4, ISO 400 x 230 frames stacked for star trails blended with a 30 second @ f/11 and ISO 400 twilight exposure
The tradeoff here is sensor noise versus capturing the fainter stars (vs light pollution). Here you have to be careful not to overexpose your stars – stars actually have different colours so if they are all white and not coloured you know you’ve probably overexposed.
Time to Shoot
So now its time to shoot…
– lock your camera down on a tripod (I sometimes use a sand bag or my camera bag hanging from the centre column hook to weigh it down)
– take a suitable twilight or light painted foreground image if you are going to use this (this will form the basis of the non sky components of your final image) using normal landscape settings (aperture stopped down, low ISO, grad filters, etc)
– do not move the camera and do not change focus
– change to star capturing settings: Aperture (at or near wide open), Shutter (500 rule or star trails settings), ISO
– put the camera in bulb mode
– if taking single starfield (Milky Way) images setup the remote trigger to take images at your chosen shutter speed (500 rule)
If taking star trails:
– setup the intervalometer to take the number of continuous frames you need – you need to setup the shutter length (e.g. 60 second exposures), the interval gap between shots (the shortest you can set this to (e.g. 1 second interval is common but my remote allows 0.1 second intervals) and finally the number of shots to take (sometimes this is limited to 99 but mine has a setting for infinite)
– ensure your camera is set to continuous shooting mode
– start the sequence once the sky is completely dark
– allow the camera to take as many images as you need – depending on how dark the skies are and whether you are shooting towards or away from the celestial pole you may choose anywhere from 30 minutes to many many hours depending on the length and density of the star trails you’d like in your final image
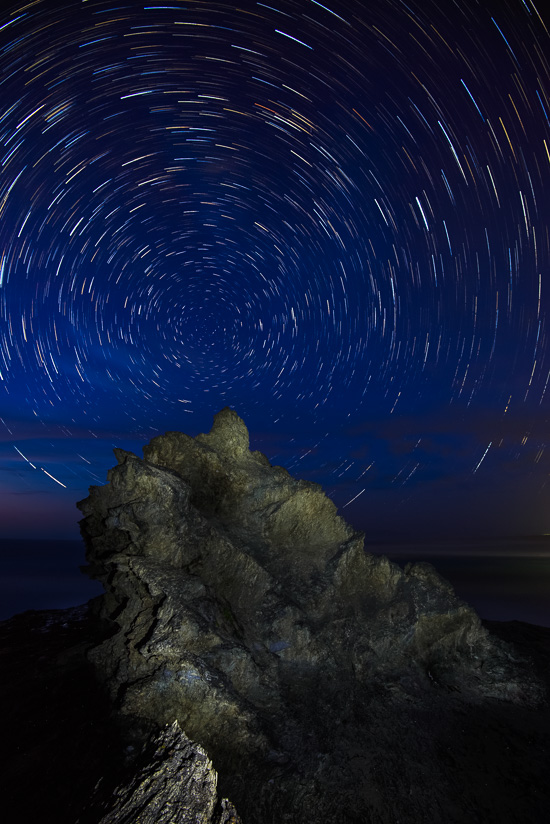
The Promise


