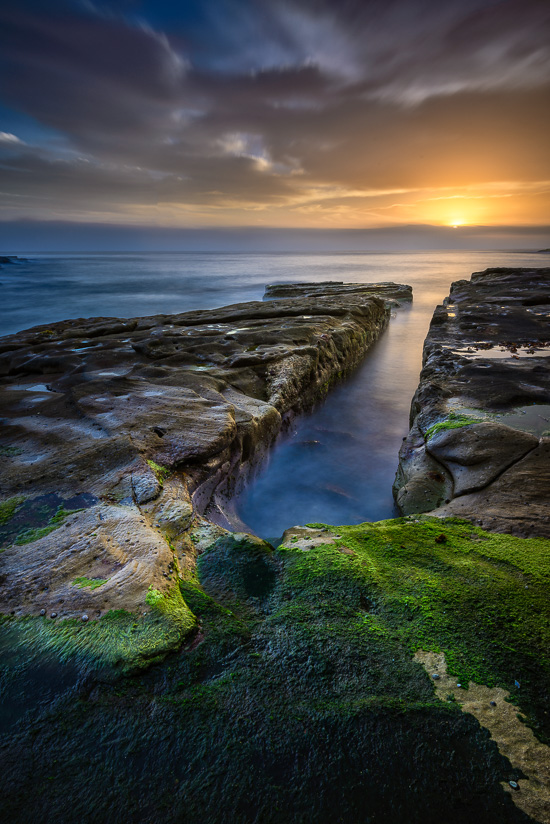
Wave Power…
by Rodney Campbell on Dec.24, 2014, under Life, Photography
Percy Bates (1870-1949) was an inventor ahead of his time. He believed he could generate electricity using power derived from the motion of waves. To conduct his experiments in the 1920s, he hand cut a 12 metre long channel in the rocks near his shed-like workshop. The surge of the waves was enhanced as it moved up the channel.
Over the channel he housed machinery that he devised to turn this power into electricity. Pumps circulated the water through a system containing a turbine and connected to a generator. In 1925 he was able to produce enough electricity to light his workshop. In August, 1920 he had submitted his drawings to the Patent Office under the title “Improvements in and relating to the utilisation of wave motion”, and in 1928 he assigned the subsequent patent to “Wave Water Co Ltd”. By 1930 this small and unique experiment was producing 5,000 watts at high tide.
Well after sunrise the sun finally rose above the heavy cloud and Gerry and I were shooting down the channel again towards the now rising sun. It was very bright by this stage so he was using the Lee BigStopper whilst I was using the Lee LittleStopper along with a CPL and the 0.9 GND.
Wave Power
Unfortunately for Gerry he’d forgotten to use his viewfinder blind and after 5 minutes or so found his image had this horrible streak down the right side – light leakage through the viewfinder.
I learnt this lesson early on when I first upgraded to a full frame camera – something about the viewfinder being larger with a much larger prism causes this. Gerry only recently upgraded so he’s yet to feel the pain enough times to do something about it. I showed him my technique – I’ve tied a thin string onto my Nikon DK-5 viewfinder cover and tied it to the camera loop on the left side of my camera so it’s always there – with just enough reach to slip onto the viewfinder.
Anyway enough of the pain… I took five (5) long exposures with this setup from 21 seconds (underexposed about a stop and a bit) through a 52 second (normal exposure) and on up to 312 seconds with the idea of blending them later in post.
I first manually adjusted the source frames in Lightroom to get them ready for blending. Note that the “normal” exposure I took was actually perfectly exposed – no clipped highlights and no blocked shadows in the RAW file. The foreground however was very dark and the sky a little washed out so I wanted to rescue that a little from the other frames rather than pushing the pixels too much in the single source RAW file. Plus I also wanted to experiment more with some new found techniques I’d been learning and researching.
Initially I tried doing a five (5) bracket 32bit un-tonemapped HDR blend in Photoshop – which resulted in total BLEH! I mean seriously it was horrible – I’d have rather adjusted the single RAW file with much better results.
Then I tried manually blending portions of my five frames as layers in Photoshop using a combination of both luminosity blending and hand blending, and with a bit of extra love first in Photoshop and then finishing touches in Lightroom we have the final result.


