Webb Bridge…
by Rodney Campbell on Jul.26, 2015, under Life, Photography
Finally it was dark enough to go back and try shooting the Webb Bridge.
Having seen many other shots of this bridge online I’d wondered if shooting from the corner bend where the bridge sort of loops back on itself was really the only spot to shoot from but once inside it is the obvious choice.
You can of course shoot anywhere but most other places you’d only have a sort of single tunnel view.
Standing inside the lit curved web interior of the Webb Bridge you immediately think wide angle view is needed. I’ve seen shots in here using a fisheye lens, I hadn’t brought mine on this trip but I don’t think even it would be wide enough for the view I wanted to portray anyway.
Webb Filled Eyes
I decided a stitched panorama encompassing a greater than 180 degree view would be required.
I’d worked out two places on the bend where I thought a good composition might work.
Note: These photographs (especially the wider shots) look much better when larger – so click any of the images below to see larger versions in an inline overlay slideshow gallery viewer.
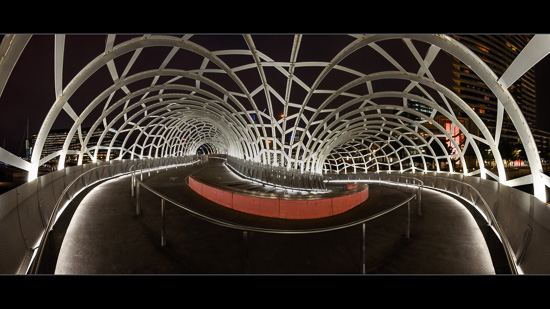
The first above is shot from a little higher up on the bend and allows you to see more down the left tunnel which is the longer wavy part which eventually joins the original Webb Dock Rail Bridge portion of the bridge which links over to Docklands.
Whilst I like seeing the curved web tunnel lead off into the distance this spot also see’s more of the closer city buildings (especially on the right).
This was a stitch of 6 vertical frames using the 16mm end of my trusty Nikon 16-35/4.
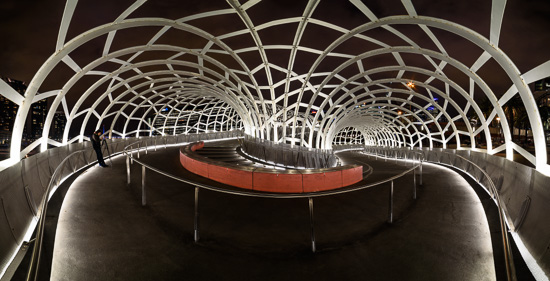
However even 16mm wasn’t quite wide enough for me so I switched to the Samyang 14mm prime for the second location and composition. Some may find it quite surprising how much of a difference that tiny 2mm can make. Take it from me the view is “MUCH” wider.
After taking the shots for the first panorama sequence I’d felt like I wanted a little more colour in the sky – it was already pretty much at the end of twilight at 6PM (50 minutes after sunset). The lighting inside the bridge was also very bright especially at the bottom behind the railing wall where the bulbs were projecting light up the ribs.
I moved a little further down the curve towards the lower entrance to the Webb Bridge with a view that sees more of the lower right hand tunnel curve.
With the aim of protecting highlight detail along with extracting more light and colour from the now near black sky I figured I would bracket each frame of the panorama and massage the images in post.
I set my camera to bracket 7 frames at 1EV steps starting around a base exposure of -1EV (so -4, -3, -2, -1, 0, 1 & 2EV) and then took the four sets of seven bracketed frames for the panorama sweep. Actually I did this whole set twice just in case (with so many people and bikes moving back and forth through the tunnel it was a patience game trying to wait for the optimum time to start a sequence of seven bracketed frames (running from half a second out to 25 seconds) without having bike lights or people mess up some or all the frames :).
In post I took one of the sets of seven bracketed frames and HDR merged them to see if it was giving me the look I wanted. As it happened it didn’t and I much preferred the more contrasty darker look rather than the washed out merge which squashed the highlights and washed out the shadows.
Finally I opted to just use the single -1EV frames to create the final panorama here :).
Shooting Webbs
Here I opted to use the second set of frames I took where this photographer had arrived and setup their spot whilst I was taking this sequence. I decided to leave them in since they stayed still long enough during the set I took when facing them.


