Archive for June, 2016
Fair Ways…
by Rodney Campbell on Jun.29, 2016, under Life, Photography
My middle daughter is playing soccer this year. With games pretty much every Sunday this is affording me a nice opportunity to do a little drone flying and practicing. The good thing about this is the variety of new ovals and thus new locations we are visiting.
I shoot the games for the families of the girls and provide a web gallery of images for them each week. Truth be told it gives me a reason to make some use my long lenses. That big and heavy (but surprisingly sharp) Sigma 50-500mm lens along with the spectacularly nice Nikon 70-200/2.8.
Fair Ways
I usually take my DJI Phantom 4 along with us, and sometimes it ends up being a location I can fire up the drone. If even for a relatively low flight over some clear open space. Either before (as in this case) during or after the game.
I’m typically pretty careful with the drone and keep it away from people and buildings and don’t fly over crowds (or the games). Sydney thankfully has quite a lot of open space, especially around the ovals, parks and waterways.
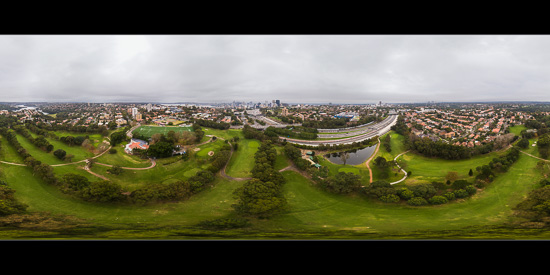
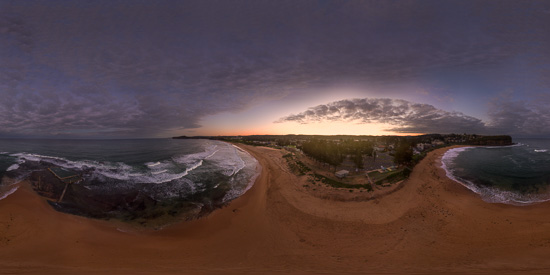
I’ve been experimenting with doing full 360˚ panoramas with the drone lately. So here is another one taken at Cammeray on Sydney’s north shore.
See a birds eye from 60m up and get an interactive view of the scene. You can control the view and look around the scene using your mouse or keyboard (e.g. arrow keys). From here we can see all the way down to the harbour and the Sydney CBD on the other side in the distance.
Note: These photographs (especially the wider shots) look much better when larger. Click any of the images below to see larger versions in an inline overlay slideshow gallery viewer.
Fair Ways
I reckon even this flattened equirectangular projection view of the whole space looks pretty good. Sometimes the complete panorama doesn’t look very good at all.
Barangaroo…
by Rodney Campbell on Jun.27, 2016, under Life, Photography
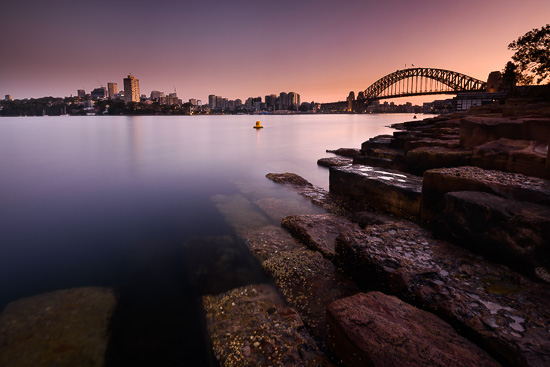
Having never shot at the new Barangaroo precinct here right at the north-western tip of Sydney’s central business district I figured it was time to give it a try. So (last year! :)) I invited Gerry to join me for a quick morning session down here to see what it might bring.
We’d heard tales of how the Barangaroo development didn’t like “professional” photographers inside Barangaroo Reserve. At least not without paying for the privilege :). The definition of “professional” essentially encompassing anyone with a “fancy” camera or tripod. We however had no such issues the morning we were there so perhaps the tales were just that.. tales…
Northern View
Note: These images (especially the wider shots) look much better when larger. Click any of the images below to see larger versions in an inline overlay slideshow gallery viewer.
Anyway this location isn’t too bad a spot – I’d imagine it would work in some parts for sunrise and in others for sunset so it’s got potential. I think it needs good clouds and colour in the sky to work well. This is something which was severely lacking the morning Gerry and I were there :(.
Barangaroo Keys
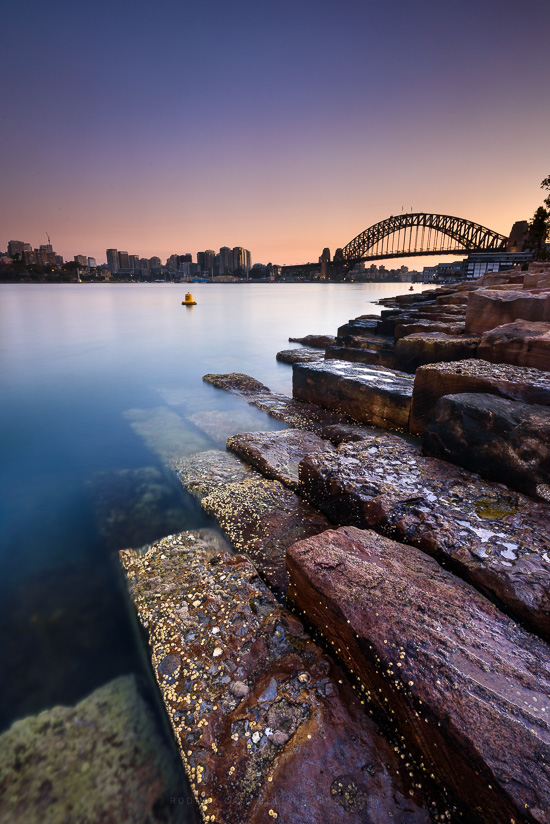
One of the big features of the new Barangaroo Reserve is the more than 10,000 sandstone blocks were used to create the extraordinary headland park on the city’s doorstep. Ninety three per cent of the blocks came from Barangaroo itself. They were painstakingly extracted from beneath what is now the Cutaway, the Reserve’s massive cultural space.
As the shot above shows this has definitely got potential. I’m now thinking of some aerial drone possibilities with this lovely rock and patterns from above :).
To be honest however I don’t think either of us was particularly enthused this morning – the sky was just bleh… Still we forced ourselves to take a few shots and Gerry even crafted a nice simplified LE from a shot of one of the navigation poles out in the water.
Curvaceous Barangaroo
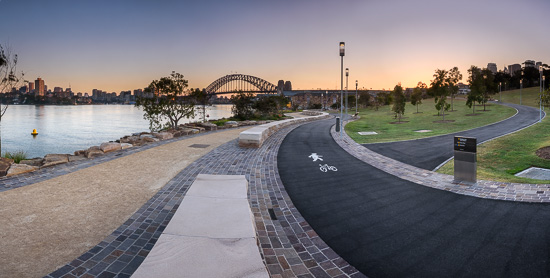
Even a stitched panorama wasn’t enough (these my last frames of the day). With the sun just about to rise on the other side of the city this panorama is the result of stitching together four vertical bracketed frames. Each of the frames the result of blending five (5) bracketed exposures from -2EV to +2EV.
Please let the breakfast be better :)…
My 360˚ Panorama Workflow Part 1…
by Rodney Campbell on Jun.26, 2016, under Life, Photography
I’ve been posting a couple of interactive 360˚ panorama photographs both on my blog and my social media streams. Since then I’ve been asked a number of questions by various friends also interested in experimenting with this.
This series of blog posts is I guess an answer to a number of those questions and perhaps others they’ve not yet thought of :). It’s a description of my current 360˚ panorama workflow along with the tools and utilities I use.
Note: These photographs (especially the wider shots) look much better when larger. Click any of the images below to see larger versions in an inline overlay slideshow gallery viewer.
Taking the Source Images
There are a number of very good tutorials which describe what is required for taking source images for a stitched panorama. I won’t go over that in any detail here. I will however offer some key tips and cover a solution when using a drone.
General Panorama Tips
– ensure you overlap your source frames (I generally recommend 50% overlap but anything down to 25% should work).
– aim to lock your exposure before taking the frames. This is to ensure auto exposure doesn’t radically alter the exposure between frames. You may need to “hedge” your chosen exposure to choose an “average” exposure setting so as to not too badly overexpose the highlights in any particularly bright frames or totally block up the shadows in any darker frames.
– don’t use a polariser (because the polarisation will change between the frames in different directions to the light source).
– aim to keep your horizon level across the frames.
– if there are objects close to the camera you may be interested in avoiding parallax issues by rotating the camera & lens around the nodal point.
360˚ Panorama Tips
Your aim may be to create a full spherical photosphere (360 degrees x 180 degrees). This may be so you can have a full interactive panorama (i.e. one in which you can look in every direction from the central point with no gap in the view). If this is the case then your final photo is likely to be in equirectangular projection at a 2:1 landscape aspect ratio.
– you will likely be taking multiple rows of images to stitch (not just for the full 360˚ round view but also upwards and downwards).
Drone Tips
You can take 360˚ panorama images with a number of 360 specialised cameras. You can also take images with mobile devices and by stitching source frames taken with any normal camera.
It is also possible to take the source frames for a 360˚ panorama using a drone like the DJI Phantom and Inspire series. There are a number of software apps (run on your mobile or tablet devices) which can make this process easier.
I’ve been using the free DronePan app.
DronePan is simple. Fire up your transmitter and DJI drone as you normally would. Launch DronePan and use the FPV screen to get to your desired altitude. Then click the “Play” button. DronePan takes care of the rest.
DronePan will take all the necessary photos at the required yaw and pitch. This will create photos that can be easily stitched together for a 360 spherical panorama. The process takes less than 2 minutes.
Stitching the Panorama
There are a number of software applications available for stitching panorama’s. Way too many applications to cover here. This very extensive article which provides a comparison of photo stitching software is available should you want to research this aspect.
Some of the options I have tried or can recommend include Adobe Lightroom, Adobe Photoshop. There are also a host of specialist panorama stitching applications including PTGui, AutoPano, The Panorama Factory and Microsoft ICE
I wont go into the specific detail of using any of these packages. There will be many tutorials online on this extensive topic.
I will mention however a couple points to keep in mind:
– not all packages support stitching multi row full 360˚ panorama’s or using extremely wide angle (e.g. fisheye) lenses.
– if you are creating a 360 spherical panorama using a drone then you will discover that the drone is unable to take source images pointing upwards towards the higher parts of the sky nor the image pointing directly up at the zenith.
– if you wish to complete the full 2:1 equirectangular projection you will be up for some post processing. This includes “filling in” the sky at the top part of your image. Generally you’ll want to “fake” this upper portion of the image – either by extending/content aware filling/cloning in the existing sky or by dropping in a new sky from somewhere else.
Entropy – Photographic Exhibition…
by Rodney Campbell on Jun.25, 2016, under Life, Photography
Entropy * Photographic Exhibition
One concept; 9 Photographers; 9 Interpretations
A small group of passionate Sydney based photographers (Parallaxis) and I have been working towards an exhibition of our work in September this year. Enfused around the theme of “Entropy” we’ve each been interpreting and creating our bodies of work for our collective goal.
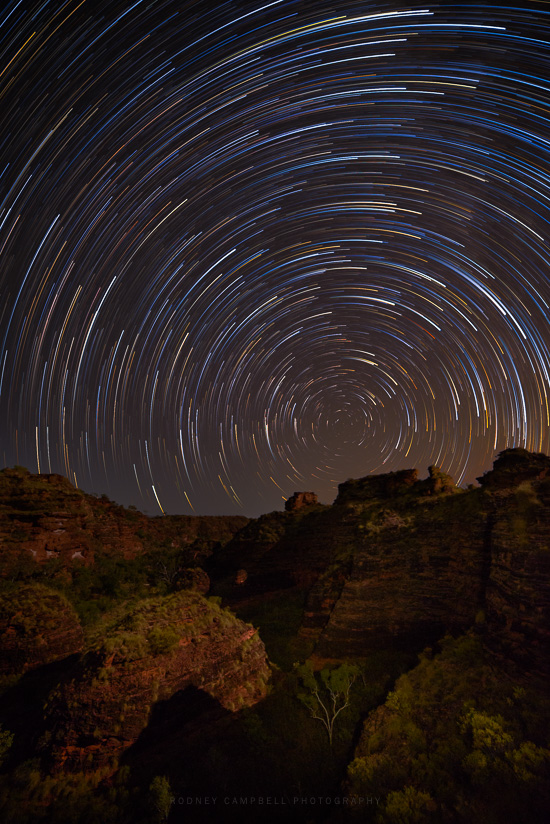
Miracles over Mirima
It is with great pleasure I can announce that I’ve now finalised my selection of images – yay! … and decided on my wall layout for the exhibition.
What is so impressive and gratifying is seeing the variation and progression in my peers work. There is such a huge variety of interpretations on our common Entropy theme. Collectively we’ve amassed an amazing and diverse array of work and I’m really looking forward to seeing the final display.
I won’t give away anything about what my fellow photographers are presenting. However I’ve hinted for some months about what I’ve been working on. So it may be no surprise the teaser above is on my theme. It’s one of my unpublished images I’d been holding back for the exhibition, however it’s one of the many images which didn’t make the final cull.
Details:
Our exhibition is going to be at The Art Space on the Concourse @ Chatswood (Sydney’s North Shore). From Tuesday 6th to Sunday 18th September 2016, if you can make it we’d love to see you there.
What’s Next?:
Next things I’ll be doing is completing all the finishing touches to my editing. Along with test prints to ensure it’s all going to work together as I’m seeing it in my head :). Very soon I’ll be doing a full size exhibition print of one of the final images. I’ll then have it mounted as I’m planning to do for the exhibition. It’s all getting very real :)… Very exciting times ahead…
For those interested in the shot above. It was taken during our amazing trip to the remote outback of the far north west region of Australia. Here we are in Hidden Valley (Mirima) National Park just outside the town of Kununurra.
There was a bright moon in the sky behind and to my right, lighting most of the landscape but also washing out the stars quite a bit. I added a little light painting of the darker foreground below with my torch. The view here is across Hidden Valley with Kununurra itself just off on the right. The star trails consist of 149 x 46 second frames (from 8PM till 10PM).
Fixing ON1 Perfect Photo Suite 8 with Photoshop CC 2015.5…
by Rodney Campbell on Jun.24, 2016, under Life, Photography
With the recent Adobe Photoshop CC 2015.5 update you may find that your plug-ins (like On1 Perfect Photo) will no longer work.
Adobe Photoshop CC 2015.5 is a full version upgrade; as such, you will need to install your 3rd party plug-ins for them to work with CC 2015.5.
Adobe has also changed the location where they install the Photoshop application and where plug-ins are loaded from. Previously installed plug-ins are not migrated to the new locations. One upshot of this is that the On1 plug-ins no longer appear in PhotoShop. Reinstalling the On1 software does not currently fix the problem.
On1 is planning updates to ON1 Photo 10 to fix this. Photo Suite 9 is not officially supported in the newest release of Creative Cloud 2015.5. They do however have a workaround to manually move the plugins into a workable location, but bugs or usage issues you may encounter with Photo Suite 9 and Creative Cloud 2015.5 do not have resolutions.
For On1 Perfect Photo Suite 8 and earlier however On1 has stated “you will no longer have access to those ON1 plug-ins after installing the Adobe Creative Cloud 2015.5 update” and suggests upgrading to Photo 10.
I have however found a solution which appears to work with On1 Perfect Photo Suite 8 (at least for Mac users):
Mac OSX
Copy each of the plug-in files from the following locations:
/Applications/Perfect Photo Suite 8/Plug-in Files/Perfect B&W/Perfect B&W 8.plugin

/Applications/Perfect Photo Suite 8/Plug-in Files/Perfect Batch/Perfect Batch 8.plugin

/Applications/Perfect Photo Suite 8/Plug-in Files/Perfect Effects/Perfect Effects 8.plugin

/Applications/Perfect Photo Suite 8/Plug-in Files/Perfect Enhance/Perfect Enhance 8.plugin

/Applications/Perfect Photo Suite 8/Plug-in Files/Perfect Mask/Perfect Mask 8.plugin

/Applications/Perfect Photo Suite 8/Plug-in Files/Perfect Portrait/Perfect Portrait 8.plugin

/Applications/Perfect Photo Suite 8/Plug-in Files/Perfect Resize Professional Edition/Perfect Resize 8.plugin
to this location:
/Library/Application Support/Adobe/Plug-Ins/CC/
Windows
Under Windows you need to do an “equivalent” copy of the .plugin files from:
C:\Program Files\onOne Software\Perfect Photo Suite 8\Plug-in Files\
to:
C:\Program Files\Common Files\Adobe\Plug-Ins\CC\
You also need to copy the DLL files from:
C:\Program Files\Adobe\Adobe Photoshop CC 2015\msvcp120.dll

C:\Program Files\Adobe\Adobe Photoshop CC 2015\msvcr120.dll

C:\Program Files\Adobe\Adobe Photoshop CC 2015\ONCore8.dll

C:\Program Files\Adobe\Adobe Photoshop CC 2015\ONCoreFoundation8.dll

C:\Program Files\Adobe\Adobe Photoshop CC 2015\ONDocument8.dll

C:\Program Files\Adobe\Adobe Photoshop CC 2015\ONProxySupport8.dll
to:
C:\Program Files\Adobe\Adobe Photoshop CC 2015.5\
Note: I am not able to test these instructions for Windows so if someone does and can confirm I’ll update 🙂
