Technology
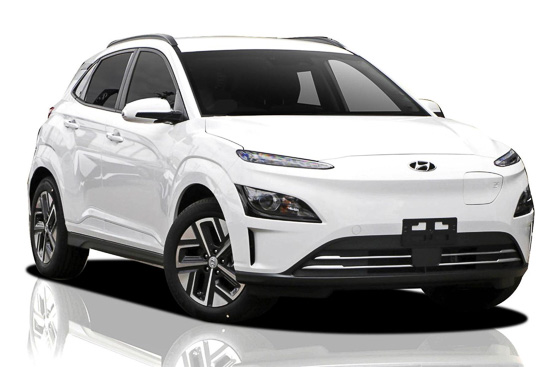
Hyundai Kona Electric
by Rodney Campbell on Mar.18, 2023, under Life, Technology
Hyundai Kona Electric
Our family has just entered the wonderful and sometimes perplexing zone of Electric Vehicles
With the arrival of our first fully battery electric vehicle we’ve ostensibly joined the growing crowd of EV enthusiasts and die hard converts. I attended the Fully Charged LIVE event here in Sydney a week ago and got to see the enthusiasm for the “revolution” first hand
We’ve also entered a new world of learning about charging and all it’s related intrigue … more on that in a later post
This will be our regular small around town car that anyone in our family can drive (even P1/P2 are permitted)
Besides the cool tech geek factor, and the being considerate of the environment factor, one of the contributing factors for the switch came about with the new government incentives for low-emission vehicles (EV’s and PHEV’s)
Full battery EV’s were/are considerably more expensive (for fleet or lease buyers) than their ICE (Internal Combustion Engine) counterparts. The cost of (large) batteries adding tens of thousands to the cost of a vehicle
For example a number of old school traditional car manufacturers (like Hyundai, Volvo and others) have essentially identical spec models available in both traditional ICE form as well as EV variants. i.e. they share the same car body and internals and features and so on with the main difference being the battery and electric motors vs petrol
Comparing say the RRP of the Hyundai Kona Elite Electric (~$57K for standard battery size or ~$64K for the long range battery) vs it’s same spec’d petrol equivalent (~$36K) you can see there’s a $20-30K premium to go electric. A similar differential exists for other manufacturers cars. Sure over the life of the vehicle the running costs (maintenance and fuel) might make up for this, but it’s a heavy upfront cost for the average buyer to bear
What the new government incentives have effectively done is shrink that gap so that the effective after tax cost of fleet/leasing ends up a lot closer. Their aim is presumably get large buyers of vehicles with regular turnover (like fleet and leasing) to switch to EV’s, and in a couple years time there will be a growing pool of second hand EV’s available at reasonable prices for everyday people to purchase and switching momentum will build
Compared @ 200mm : 24-200 Vs 28-300 Vs 70-200
by Rodney Campbell on Jul.05, 2020, under Life, Photography, Technology
A reader was interested in the performance of the new compact all-in-one Nikon Z 24-200mm f/4-6.3 VR lens from the perspective of a landscape photographer. He was particularly interested in how it might stack up to say a 70-200/2.8 when compared @ 200mm
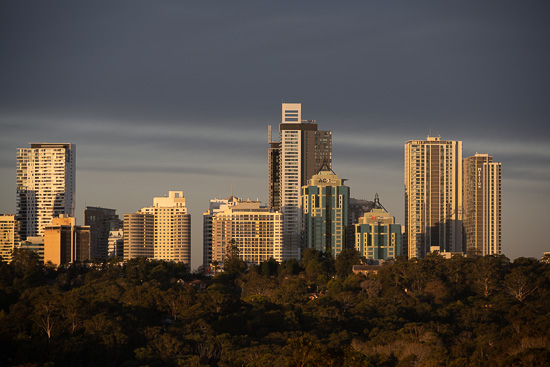
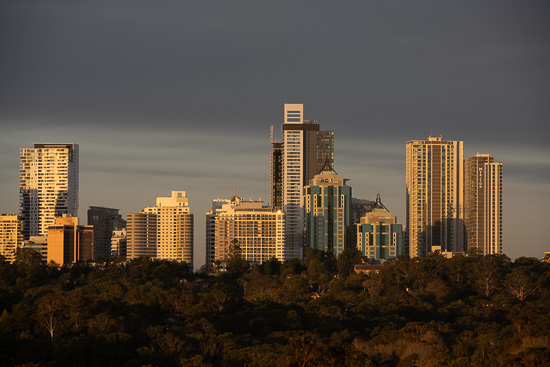
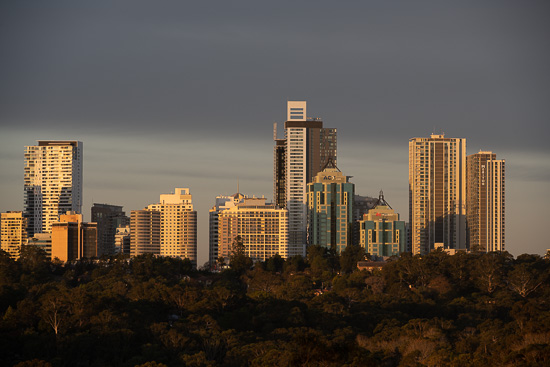
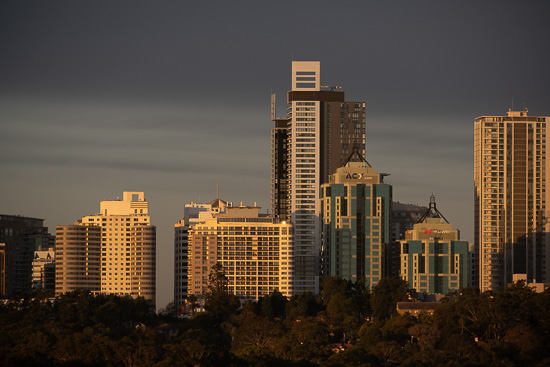
So herein lies some sample images taken of a distant cityscape scene (it has nice sharp lines to compare)
I’ve tested three lenses:
- The Nikon Z 24-200mm f/4-6.3 VR – 570g & 77x114mm
- The Nikon AF-S 28-300mm f/3.5-5.6G ED VR – 800g & 83x115mm
- The Nikon AF-S 70-200mm f/2.8G ED VR II – 1530g & 87x206mm
All shooting the same scene using a Nikon Z7 body on a tripod and using a remote shutter release. All three were compared @ 200mm at f/8 and focused on the same area in the midground tree’s
Nikon Z 24-200 @ 200
Nikon F 28-300 @ 200
Nikon F 70-200 @ 200
Note: These photographs (especially the wider shots) look much better when larger. To see larger versions in an inline overlay slideshow gallery viewer click any of the images.
I’ve also included a shot below with the 28-300 set to 300mm. To show the extra “reach” you might get with the 28-300 when shooting subjects near infinity. I already covered the massive difference induced by focal breathing when shooting closer subjects with this lens in another post: Testing Nikon 28-300 @ 300mm Vs the Nikon Z 24-200 @ 200mm – Focus Breathing. In short the 24-200 @ 200mm has a greater “reach” than the 28-300 for closer subjects
Nikon F 28-300 @ 300
When looking at the full size images it’s hard to see a lot of difference between the three lenses @ 200mm
So we’ll have to dig deeper for any apparent differences for landscape work. What follows are some 100% crops of two areas of the image for comparison
The first trio are on the buildings towards the centre of the frame. The second set are on the trees in the far bottom left corner of the frame
Looking at the centre shots full size on my monitor there isn’t a whole lot in it. The differences are pretty subtle and very much pixel peeping. The 24-200 and 70-200 are a little sharper than the 28-300 – e.g. when looking at the lettering on the building. If anything the 24-200 is perhaps even the tiniest bit sharper than the 70-200
Nikon Z 24-200 @ 200
Nikon F 28-300 @ 200
Nikon F 70-200 @ 200
The 100% crops from the extreme corner however tells a different story. There the 28-300 is well behind. The 24-200 and 70-200 are closer together but the 70-200 wins this round with the sharpest corners
It seriously would want to however… the 70-200 is a pro f/2.8 lens being stopped down 3 whole stops to f/8 vs the 24-200 only being stopped down from f/6.3 to f/8. It’s almost three times the price and also three times the weight
Nikon Z 24-200 @ 200
Nikon F 28-300 @ 200
Nikon F 70-200 @ 200
In the end I’d say I’d be more than happy to use the Nikon Z 24-200mm f/4-6.3 VR for (longer focal length) landscape work. It’s not quite as composed at the 70-200 in the extreme corners but it definitely holds up very well
It gives me the convenience of the 24-200mm focal range all in one small and light package. Especially when compared to the 24-70 + 70-200 combo (570g vs 2430g – not even including the FTZ )
Nikon Z 24-200mm Handheld VR Tests
by Rodney Campbell on Jun.27, 2020, under Life, Photography, Technology
Today I’m testing the Vibration Reduction (VR) capabilities of the new Nikon Z 24-200mm f/4-6.3 VR lens. This is one of the first Nikon Z FX lenses to include VR in the lens. In theory the specs say the Vibration Reduction is rated for up to 5 stops
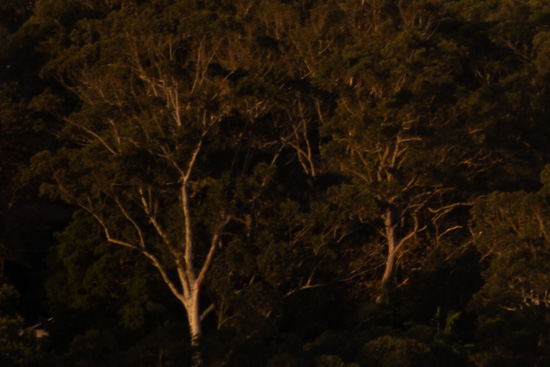
For these tests I waited till early twilight and shot with the 24-200 attached to my Nikon Z7 at 200mm handheld
Common wisdom would say that to shoot acceptably sharp images handheld with this combination would require a 1/focal length (1/200 sec) shutter speed. Probably even faster given the Z7’s 46MP high sensor resolution
The way I completed the test is that I
- shot in Manual mode
- with the aperture fixed at f/8
- I adjusted the shutter speed and ISO between sets (doubling the shutter speed and ISO each time)
- with Vibration reduction turned ON in the camera’s menu settings Note the 24-200 doesn’t have a physical VR switch on the lens like older F-Mount lenses. The function is completely controlled from the camera
On the Nikon Z50 DX camera body (which doesn’t have IBIS) the vibration reduction works alone. The lens adds 5 stops of built-in optical vibration reduction, but also works in tandem with IBIS on Nikon bodies that include IBIS like the Z6 and Z7
I shot sets at various shutter speeds – if we say that 1/200 sec is the target “normal” then I took sets of images at 1/6 sec (5 stops slower), 1/3 sec (6 stops slower) and 0.6 sec (7 stops slower)
For each set at a certain shutter speed I took 10 images handheld with good handholding technique
When reviewing these sets of ten images in post I had roughly 4-6 images which were as sharp as what you see below. The rest would be what I would call not acceptably sharp to varying degrees. Still a 50% hit rate to me is more than acceptable at these very slow handheld speeds
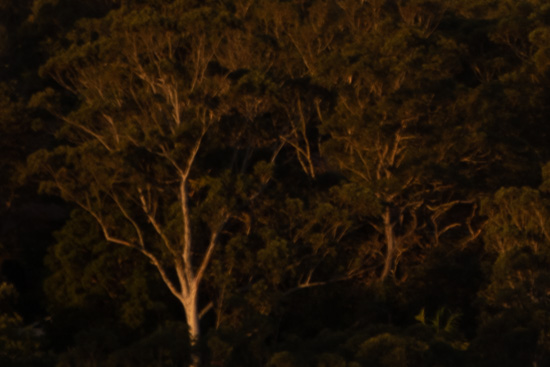
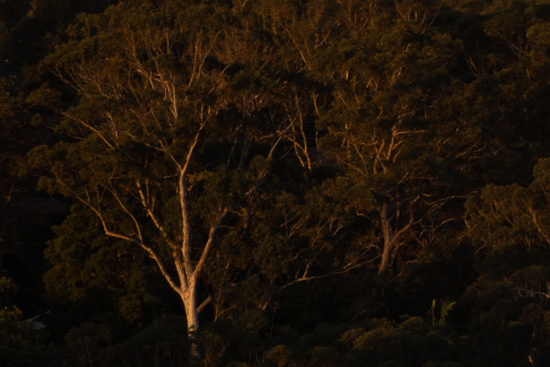
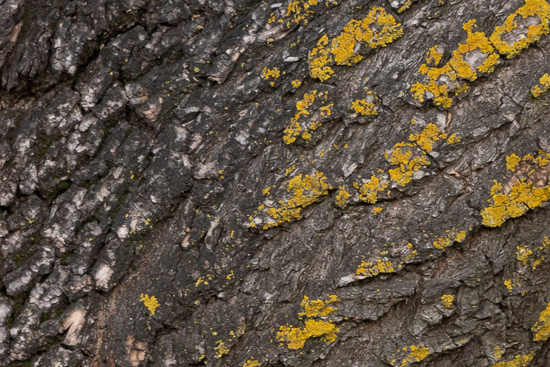
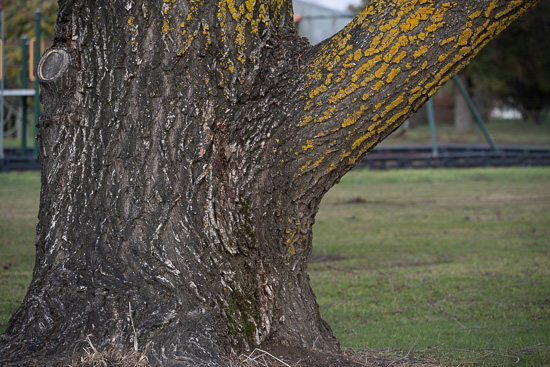
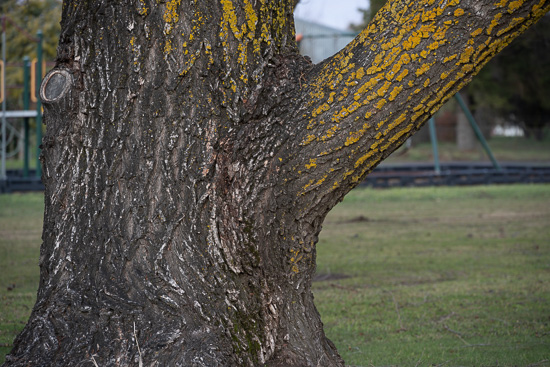
In this post I’ll be showing pairs of images taken at the different shutter speeds handheld. The first of the pair is the complete image frame and the second is a 1600 pixel wide 100% crop from the frame. I’ve tried to align the 100% crop across the sets so you’ll see roughly the same spot on the tree
Vibration Reduction On (5 Stops)
Vibration Reduction (5 Stops)
Note: These photographs (especially the wider shots) look much better when larger. To see larger versions in an inline overlay slideshow gallery viewer click any of the images.
Vibration Reduction On (6 Stops)
Vibration Reduction On (6 Stops)
Vibration Reduction On (7 Stops)
Vibration Reduction On (7 Stops)
Lastly here is what you get when you take the shot with VR turned off – yes a blurry mess
Vibration Reduction Off
Vibration Reduction Off
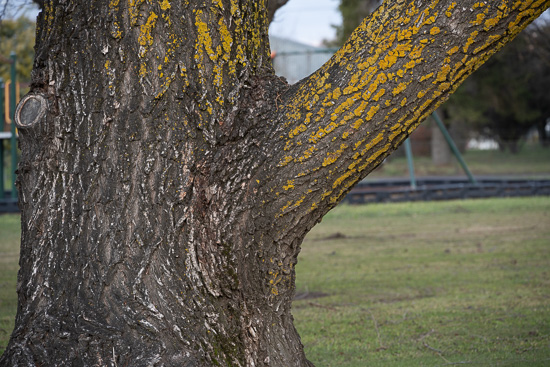
Finally here’s one I took wide open at 200mm, earlier in the day at a more sensible 1/200 sec shutter speed handheld

Testing Nikon 28-300 @ 300mm Vs the Nikon Z 24-200 @ 200mm – Focus Breathing
by Rodney Campbell on Jun.25, 2020, under Life, Photography, Technology
Having watched Ricci’s excellent youtube video comparison of the Nikon Z 24-200mm Vs Nikon 28-300mm, one thing he showed us was the crazy levels of focus breathing that existed in the older F-Mount 28-300mm lens. Especially in comparison the the new Z-Mount 24-200mm lens which appeared to have essentially none
Why does this matter do you ask… Well for one thing – it means that whilst:
- focusing on objects near infinity, the 300mm end of the 28-300 “may” give you a magnification and Field of View (FoV) of a more telephoto 300mm lens
- however when you focus on objects that are closer, that so called 300mm lens actually gives you a field of view of a much wider (less telephoto) lens (much less than 300mm and as it turns out less than 200mm even)
So there will be folks who might be wondering about the “reach” they might be giving up if they were to switch from the F-Mount Nikon 28-300mm ultrazoom lens to the new Z-Mount 24-200mm ultrazoom lens
How much less do you ask – well I figured as I now have both lenses (my new Z 24-200 just arrived :)) I’d do some test shots
So here I’ve setup a ruler standing in front of a window and I have my camera (a Nikon Z7) on a tripod
I’ve taken pairs of test shots from the exact same camera and position (tripod hasn’t moved). All I’ve done between the two shots is swapped the lens. In the first shot I’m shooting with the Nikon Z 24-200mm f/4-6.3 VR @ 200mm and in the second I have the Nikon AF-S 28-300mm f/3.5-5.6G ED VR @ 300mm attached to the Z7 using the FTZ adapter. In both cases the in camera sensor plane is exactly the same distance from the ruler
In this first pair of shots below (Nikon Z 24-200 @ 200mm on top and Nikon 28-300 @ 300mm bottom) I’ve taken the images near the Minimum Focusing Distance (MFD) of the lens (near 0.5m)
In this case you can see that the Nikon Z 24-200 @ 200mm actually has a narrower field of view than the Nikon 28-300 @ 300mm (so that 300mm lens is actually providing significantly less than 200mm of magnification here)
Nikon Z 24-200mm f/4-6.3 VR @ 200mm near MFD (~0.5m)
Nikon AF-S 28-300mm f/3.5-5.6G ED VR @ 300mm near MFD (~0.5m)
Note: These photographs (especially the wider shots) look much better when larger. To see larger versions in an inline overlay slideshow gallery viewer click any of the images.
It’s actually not till after 1.7m away that the 300mm end of the 28-300 even comes close to matching the 200mm of the 24-200
Nikon Z 24-200mm f/4-6.3 VR @ 200mm at 1.7m
Nikon AF-S 28-300mm f/3.5-5.6G ED VR @ 300mm at 1.7m
So what does this mean… well for shooting closer subjects (like < 2m away) the Z mount 24-200 actually provides greater “reach” (a narrower field of view) at 200mm than the old F-Mount 28-300mm does even at 300mm
My Nikon Z7 Settings…
by Rodney Campbell on Jun.21, 2020, under Life, Photography, Technology
About a year ago I purchased a new Nikon camera body (the Nikon Z7)
It was to be a replacement for my full frame Nikon D750 D-SLR and my first foray into the mirrorless camp. One year in and the conversion, along with an accumulation of excellent Nikon Z series lenses, has been an outstanding success
I’m a compulsive researcher and ADD list maker so I’d done much research on all those little settings which are available in camera. Therefore I figured I might just share the result of my detailed study and how I’ve setup my Z7 for daily use (basically all my default settings)
Also for those who are interested I’ve previously published my recommended settings for the Nikon D90, D7000, D600 and D750
Note these settings would equally apply to the Nikon Z6 and many would likely also translate to the Nikon Z50
Firstly I should say that I primarily shoot in Aperture priority mode or Manual. This is mostly because I like to be able to control my depth of field – and because I’m mostly taking shots of landscape, people, portraits or things
So on to the Z7 camera settings I use… The following lists mostly show the settings I’ve changed which are different from the Nikon Z7 Defaults…
Z7 Settings:
Turn off touch shooting on the touch screen (only Touch AF On)
Release mode: Continuous L (2fps)
Monitor Mode Button: Prioritize viewfinder (Automatic display switch -> Viewfinder only -> Monitor only -> Prioritize viewfinder)
Z7 Playback Menu:
Display options: Highlights & RGB Histogram & Overview
Image review: On (monitor only) / Off (Default On)
Rotate tall: Off
Z7 Photo Shooting Menu:
File Naming: …
Image Quality: NEF (RAW)
Image size: RAW Large
NEF (RAW) recording -> NEF (RAW) compression: On – Lossless compressed
NEF (RAW) recording -> NEF (RAW) bit depth: 14-bit
ISO sensitivity settings: ISO 64, Auto ISO: [Max: 25600, Min Shutter: Auto]
White balance -> A Natural light auto
Set Picture Control: Neutral (Default Auto)
Long exposure NR: Off
High ISO NR: Low? (Default: Norm) – JPEG only
Vignette control: Off (Default: Norm) – tags RAW EXIF
Auto bracketing: AE bracketing (Default AE & Flash bracketing)
Z7 Movie Shooting Menu:
File Naming: …
Frame size/frame rate: 2160p25 (4K 25fps)
Movie quality: High
Movie file type: MOV
ISO sensitivity settings: ISO sensitivity (mode M): 64 (Default 100)
Set Picture Control: Neutral (Flat?) (Default Same as photo settings)
High ISO NR: Normal (Default)
AF-area mode: Auto-area AF (Default Single-point AF)
Z7 Custom Settings Menu:
a Auto Focus:
a2 AF-S priority selection: Focus
a9 Focus point wrap-around: Wrap (Default No Wrap)
a11 Low-light AF: On (Default Off)
a12 Built-in AF-assist illuminator: Off (Default On)
c Timers/AE lock:
c3 Power off delay: Playback: 10s/20s, Menus: 1m, Image review: 2s, Standby timer: 30s
d Shooting/display:
d1 CL mode shooting speed: 2 (Default 3)
d5 Shutter type: Auto
d9 Framing grid display: On
d10: Peaking Highlights: Peaking Level: 1; Peaking highlight color: Yellow
e Bracketing/flash:
f Controls:
f1 Customize i menu: See Below
f2 Custom control assignment: See Below
f3 OK button: Zoom 100% (Default RESET center focus point)
g Movie:
g1 Customize i menu: See Below
g2 Custom control assignment: See Below
g3 OK button: Zoom 100% (Default RESET center focus point)
i Menu for Photo mode:
| Auto bracketing | Shutter type | Split-screen display zoom | Wi-Fi connection | Silent photography | AF-area mode |
| White Balance | Peaking highlights | Metering | Apply settings to live view | Vibration reduction | Focus mode |
Button customization in stills mode:
Fn1: Press -> MY MENU (Default: White Balance)
Fn2: Focus mode/AF-area mode (Default: Focus mode/AF-area mode)
AF-On: (Default: AF-On)
Sub-selector: Focus point selection
Sub-selector center: Select center focus point (RESET) (Default AE/AF lock)
Movie [Rec] button: Auto bracketing
i Menu for Video mode:
| Highlight Display | Frame size and rate/image quality | Microphone sensitivity | Wi-Fi connection | Electronic VR | AF-area mode |
| White Balance | Peaking highlights | Wind noise reduction? | Headphone volume | Vibration reduction | Focus mode |
Button customization in video mode:
Fn1: Default: White Balance
Fn2: Focus mode/AF-area mode? (Default: Focus mode/AF-area mode)
AF-On: AE/AF Lock? (Default: AF-On)
Sub-selector center: Select center focus point (RESET) (Default AE Lock)
Z7 Setup Menu:
Time zone and date: …
Monitor brightness: -2 (Default 0)
Clean image sensor: Clean at shutdown
Copyright Information: …
Slot empty release lock: Lock (I want the camera to prevent me from taking a picture if a memory card is not installed)
Z7 Setup MyMenu:
Setup menu: Airplane mode
Setup menu: Format memory card
Setup menu: Non-CPU lens data
Setup menu: Monitor brightness
Setup menu: Battery info
Shooting menu: Choose image area
Shooting menu: Focus shift shooting
Custom Settings Menu: d4 Exposure delay mode (great for tripod use)
Custom Settings Menu: a5 Focus points used
Custom Settings Menu: a4 Auto-area AF Face Detection
Setup menu: Time zone and date
On top of this I also use the three User settings mode dial slots (U1, U2 & U3) to store extra customised shooting settings for quick access (e.g. one tailored for tripod style landscape shooting, one for tripod style long exposure/night photography and one for action photography). These U1, U2 and U3 slots start with the above general settings and have the following additional starting point customisations.
U3 – Landscape: Aperture Priority & f/8, ISO 64, Auto ISO Off, Single-Point AF (centre point selected) (Pinpoint AF?), Vibration reduction: Off, a4 Auto-area AF Face Detection: Off, a11 Low-light AF: On, c3 Power off delay: Playback: 20s, Menus: 1m, Image review: 10s, Standby timer: 1m, d5 Shutter type: Auto, d10 Peaking highlights: On/2
U2 – Long Exposure/Night: Manual & f/8, ISO 64, Auto ISO Off, Single-Point AF (centre point selected) (Pinpoint AF?), Vibration reduction: Off, a4 Auto-area AF Face Detection: Off, a11 Low-light AF: On, c3 Power off delay: Playback: 20s, Menus: 1m, Image review: 10s, Standby timer: 1m, d5 Shutter type: Auto, d10 Peaking highlights: On/2
U1 – Action: Aperture Priority & f/2.8, Auto ISO On [Min Shutter: Auto*2], Continuous-Servo AF (AF-C), Dynamic/Auto Area AF, RAW 12 bit compressed (increases buffer depth), Metering Center-weighted?, Vibration reduction: SPT (Sport), a1: AF-C priority selection: Release, a3 Focus tracking with lock-on: 4, a5 Focus points used: 1/2 Every other point, a6 Store points by orientation: On, a7 AF activation: AF ON only? (back button focus), d1 CL mode shooting speed: 5fps, d8 Apply settings to live view: Off, d9 Framing grid display: Off?
